Лучшие движки для создания игр. 5 платных вариантов
Содержание:
- STRUCTS
- NEW PHYSICS FUNCTIONS
- Обзор интерфейса
- RPG Maker
- CHAINED ACCESSORS
- C:\Windows\Fonts\MySql
- Возможности
- THE MARKETPLACE
- Для начинающих
- ARRAYS
- Обучение GameMaker: Studio
- Features of Game Maker Studio 2
- FUNCTIONS, SCRIPTS AND METHOD VARIABLES
- EXCEPTIONS, TRY, CATCH AND FINALLY
- Установка русификатора
- Особенности программы Game Maker Studio
- Итоги обзора Game maker studio
STRUCTS
The next new feature that we want to discuss in GameMaker Studio 2.3 is the creation of structs. A struct is — to put it simply — a variable that holds a collection of other variables — you can think of it as a kind of «light-weight object». The variables that a struct holds can be of any data type and these variables can be read from and written to after the initial struct declaration, and you can also add more variables to a struct after it has been declared. It should also be noted that the contents of a struct are independent of the instance or script that created it, and as such you can — if you wish — use the built-in variable names like or and . One of the benefits of using structs is that (unlike instances), after the initial creation, structs have no processing overhead while they exist, although they will take up space in memory. The struct syntax is as follows:
So, an example of this in practice would be:
The above creates an instance scope struct in the variable «mystruct» and populates it with some values (structs can be created at local, instance and global scope, just like any other variable). Note that you don’t have to populate the contents of a struct when it is created initially and you can create an empty struct by simply doing this:
This struct can then be added to at a later point in the game code. Here is an example of a struct with various variables and data types:
You’ll notice in the above code that you can also define methods and use runtime functions in structs, and that you can use expressions consisting of any variable previously defined within the context of the struct itself, as well as any variable defined within the scope of the struct itself.
Once a struct has been defined, you can access the data within using the «point» notation, like this:
You can also perform operations on the variables within a structure or use them in functions, just as you would any other variable. For example:
Finally, structs can have other structs nested inside of them, like this:
To access such nested structs you would still use the point notation, like this:
When a struct is no longer required it can be removed from memory using the operator, which is another new GML feature added in the 2.3 update. This de-references the struct and hints to the garbage collector that it may be available for collection. This is not strictly required as the garbage collector may do this automatically in the following game steps if the struct is no longer referenced in your code, but it is good practice to do so and we recommend it (for example, call delete in the Clean Up event of an instance to explicitly tell the garbage collector that an instance scope struct is to be deleted).
Also note that structs can be created using functions, which requires the use of the operator and the keyword (two more new features to GML), as shown in the following example:
Here we are creating the function and telling GameMaker Studio 2 that this is a function for making a struct by adding the keyword after the definition. You can then call this function like this:
Now the variable v1 will reference a struct with the variables x and y and the static method variable .
Note that there are other additional functions for structs, specifically:
Check the manual for details of how these functions should be used.
NEW PHYSICS FUNCTIONS
There has been a major update to the built-in physics library, which now includes a soft-body particle simulation based off the Liquid Fun library for Box2D. permit the creation of simulated soft-bodies using rigid body physics. Basically, this means that you can create a shape from particles that maintain cohesion and so simulate a full body, which, due to the interaction of the particles, gives the impression of a soft body. You can also use the physics particles to simulate liquids and other particle based physics systems.

You can find out more information about the new physics particles from the YoYo Games Tech Blog and the GameMaker Manual.
Обзор интерфейса
Последней версией Game maker studio №1 была 8.1.140, на сегодняшний день она перестала поддерживаться, так была выпущена новая версия Game maker studio 2.
Так же на официальном форуме можно скачать русификатор для движка.
Ссылка на русификатор: Google drive
После того как вы скачали и установили Game maker studio запускаем его и в окне вводим данные, которые зарегистрировали на официальном сайте при скачивании. После ввода данных нам открывается интерфейс движка.

Так как мы используем бесплатную версию программы, категория «Изучение» нам не будет доступна.
Для того, чтобы начать разработку игры, нажимаем на кнопку «Создать» и в следующем окне «Drag and Drop» после чего откроется окно, в котором нужно придумать название проекта и сохранить в удобное для вас место.
После того как откроется рабочее пространство, можно увидеть вкладки с правой стороны окна, где и будут сортироваться наши части игры.

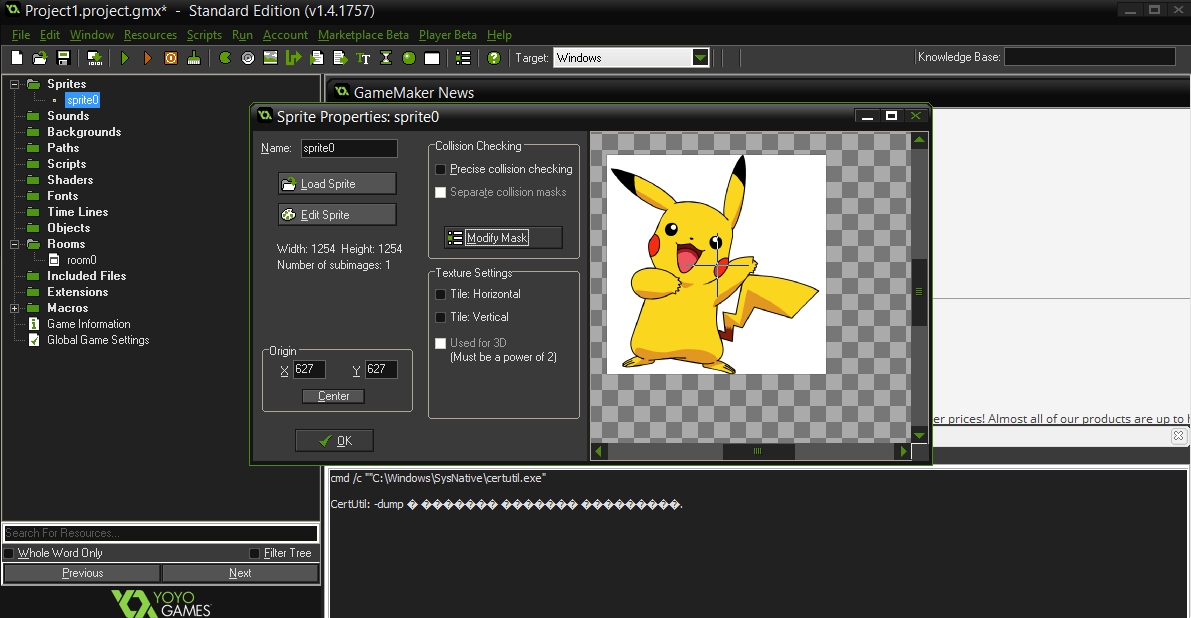
Для того что бы начать работать и создавать объекты нам нужно будет нажать правой кнопкой по пустому пространству, и выбрать пункт «Ресурсы». В выпавшем окне выбираем с создания чего будем начинать разработку.

При создании спрайта нам откроется меню создания, анимированные персонажа нашей игры. Тут можно полностью с нуля, попиксельно, нарисовать персонажа или же импортировать уже готового. Так же анимировать его, создать по кадровую анимацию действий персонажа.

Для создания карты нам нужно выбрать «Ресурсы», а затем в выпавшем окне «Создать комнату». В редакторе комнаты предоставляются возможности задать размер, фон, установить элементы взаимодействия, разместить персонажей, нарисовать пути и т.д. В редакторе комнаты так же можно импортировать уже готовый фон или создать его саму с помощью этого редактора.

Создание событий можно произвести без обращения к программированию и созданию скриптов, все делается с помощью довольно интуитивно понятных меню и окон. Можно продумать и создать довольно сложные сценарии действий для объекта с помощью визуального редактора Game maker studio.

С помощью параметров можно выбрать платформу для которой создается игра и провести тонкие настройки игры, такие как размер окна для воспроизведения игры, версии, ярлыки, заставки при загрузке и т.п.

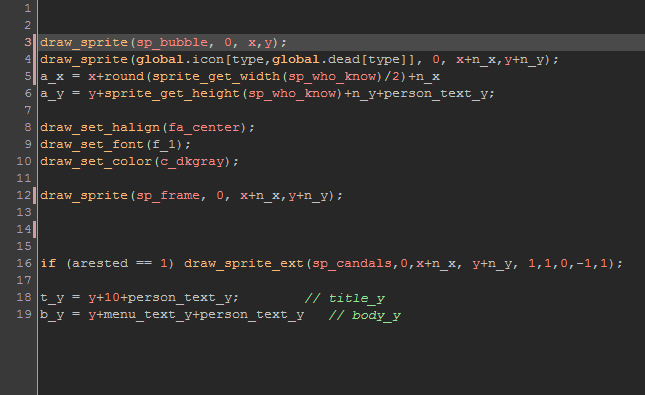
Стоит заметить часть программы, в которой нам дается возможность работать с кодом на языке GML. Очень радует та легкость, с которой простые командные функции могут быть сделаны. Поэтому если вы начинающий Game creator и готовы посвятить этому большую часть времени, тогда вам просто необходимо заняться изучением языка GML.
RPG Maker
История одного из самых знаменитых конструкторов ролевых игр началась ещё в конце 1980-х. Более поздние версии для Windows, созданные японскими разработчиками, получили широкое распространение на Западе. Сегодня популярность движка достигла таких масштабов, что тег RPG Maker в Steam представляет уже не столько игры на самом движке, сколько собирательный образ тематического направления в геймдеве. Этот феномен легко объяснить.
RPG Maker используют преимущественно для создания JRPG в стиле ранних частей Final Fantasy. Сам жанр требует огромного количества ресурсов: локаций, персонажей, мобов и так далее. Большинство тех, кто работает в RPG Maker, используют дефолтные шаблоны движка, дополняя их собственными персонажами и иллюстрациями. Иногда даже NPC в этих играх созданы только с помощью генератора. Поэтому игры на RPG Maker, как правило, выглядят очень однотипно. Лень тут ни при чём: у большинства инди-разработчиков просто нет времени, навыков и ресурсов, чтобы сделать всё с нуля. А готовые системы сохранения, боя и интерфейс тяжело изменить. Даже если потратить на кастомизацию достаточное количество времени, мелкие детали в интерфейсе всё равно выдадут RPG Maker.
Сейчас существует несколько версий редактора. Последняя — RPG Maker MZ — вышла в 2020 году. Базовая версия обойдётся в 1 389 рублей. Также не стоит забывать о DLC с наборами тематических ассетов, которые наверняка потребуются начинающему разработчику.
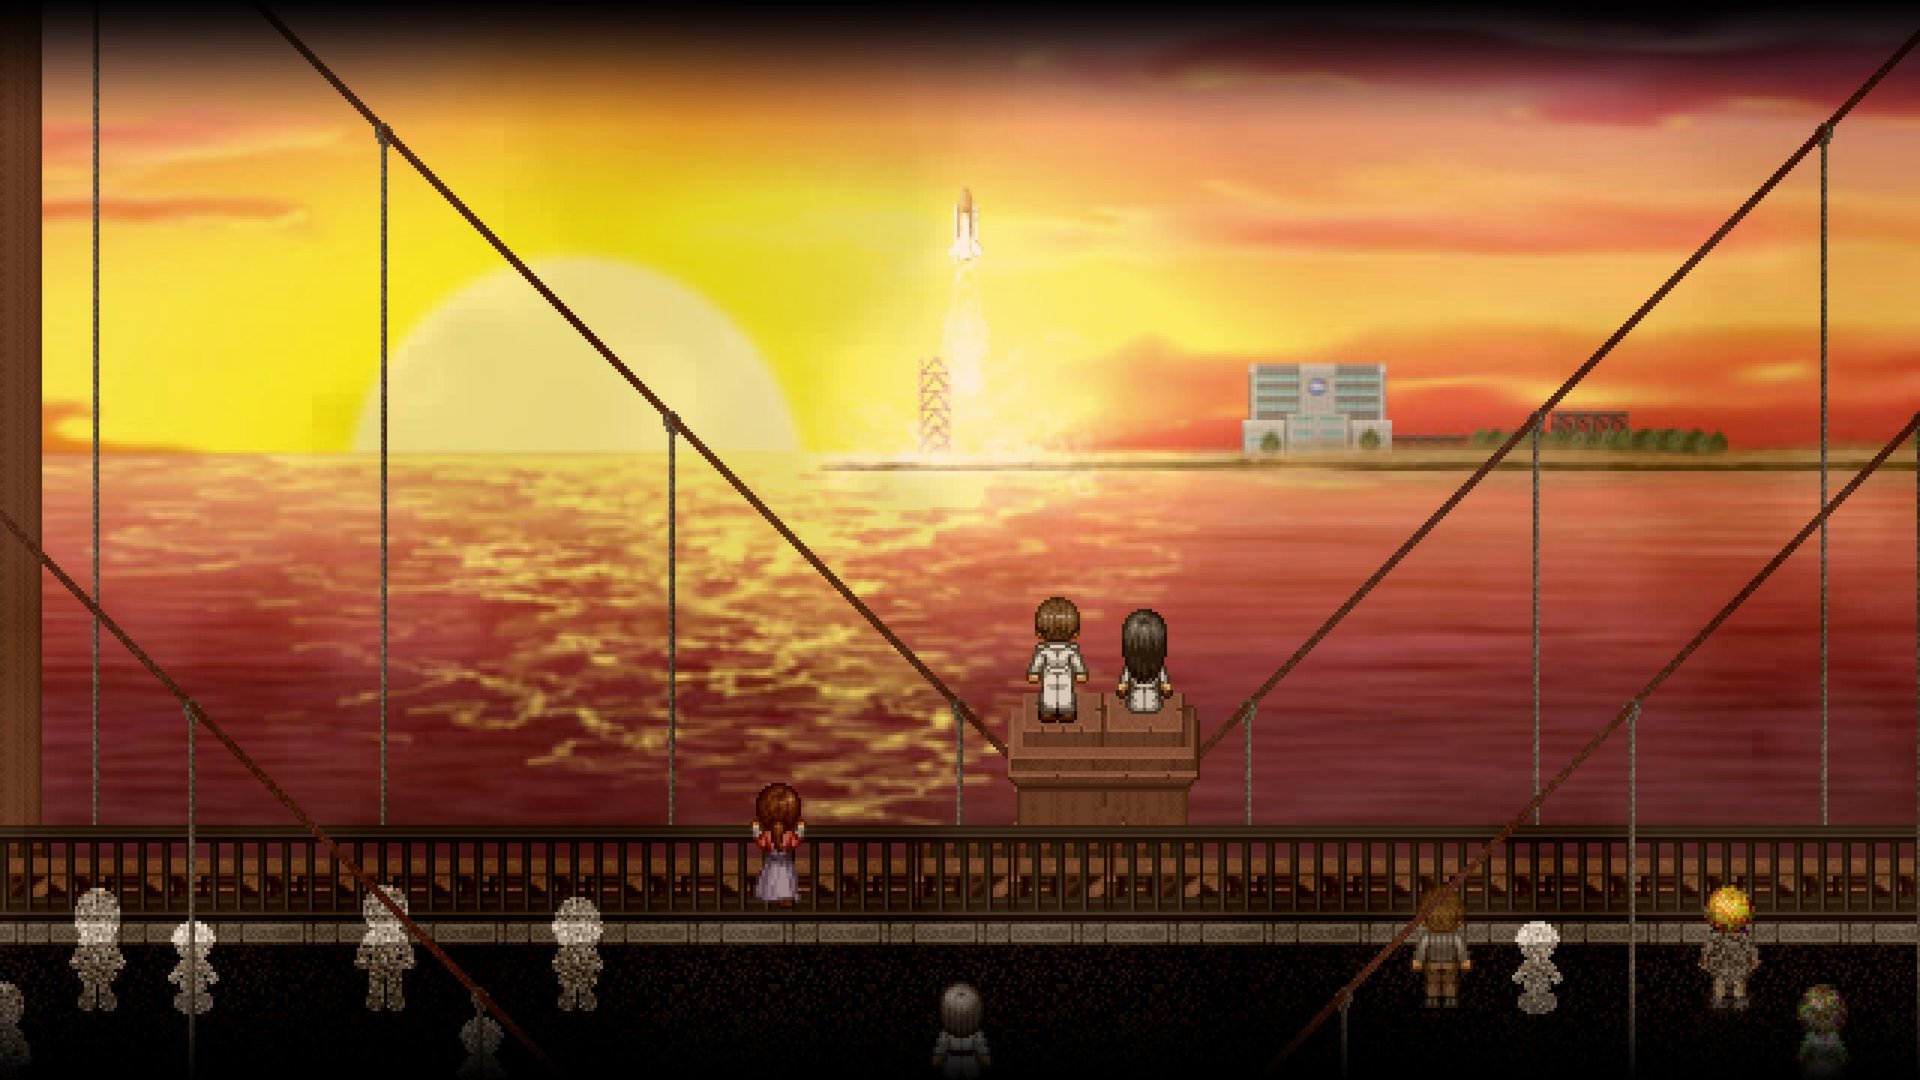
Скриншот из To the Moon — игры, созданной на RPG Maker. Скриншот: игра To the Moon / Steam
Преимущества:
- не требует навыков программирования, более опытные разработчики могут оценить гибкость движка с помощью JavaScript;
- кросс-платформенность (Windows, Mac OS X, HTML5; iOS и Android — в RPG Maker MV);
- огромное количество плагинов: игру можно сделать фактически с нуля без помощи художников и композиторов;
- на тематических форумах есть бесплатные ассеты.
Недостатки:
- большое количество ассетов и DLC, которые следует докупать отдельно;
- неоправданно большой «вес» проектов: согласно порталу gamedesigning.org, игра занимает от 400 МБ независимо от количества контента, к тому же конструктор нередко создает резервные копии, засоряя жёсткий диск;
- если перемудрить с ассетами, игра начнет тормозить — выявить причину будет непросто;
- портирование на мобильные платформы может сопровождаться неприятными багами.
Игры на движке: To the Moon, Hello Charlotte, Grimm’s Hollow, Lawmage Academy.
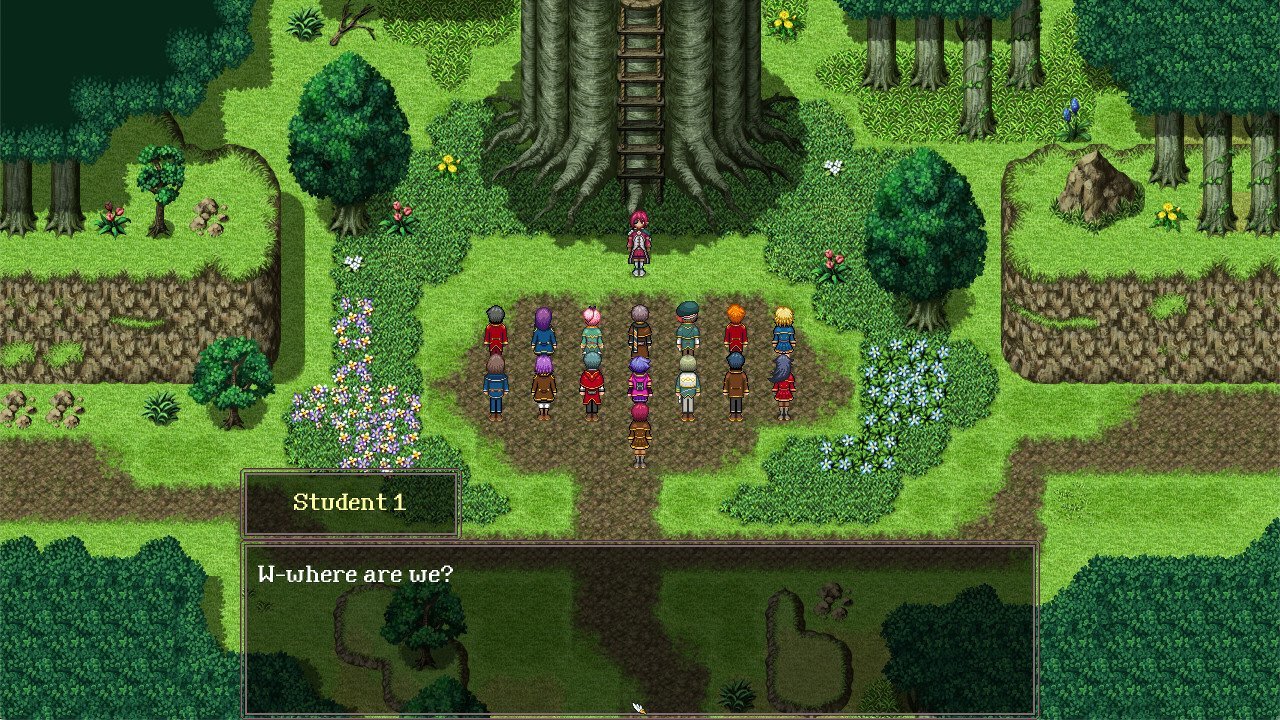
Скриншот из Lawmage Academy — игры, созданной на RPG Maker. Скриншот: игра Lawmage Academy / Steam
«Мне хотелось сделать добротную двумерную RPG с приятным геймплеем, хорошей боёвкой и презентабельным визуалом. Я понял, что мне не хватит опыта и бюджета для работы с Unity 3D или UE4 (если не считать работой сборку игры сомнительного качества из готовых ассетов), поэтому я остановился на RPGMaker, тем более что мне уже доводилось с ним работать. Это замечательный инструмент, но, к сожалению, за годы у него сложилась репутация конструктора плохих игр, которые порой бывают даже хуже, чем поделки на Unity. Отчасти это связано с простотой его использования. Практически любой желающий может сразу создать игру на RPG Maker, достаточно посмотреть пару обучающих видео. Однако реальные возможности движка сильно ограничены: на нём можно сделать только JRPG в стиле Final Fantasy, для иных жанров потребуется масса плагинов, а ещё предстоит потратить время на работу с кодом».
Manly Mouse Studios, инди-разработчик (The Singularity Wish). Дневник разработчика, октябрь 2019 года

Скриншот из The Singularity Wish — игры, созданной на RPG Maker. Скриншот: игра The Singularity Wish / Steam
«RPG Maker действительно очень простой движок. Его простота и доступность привели к тому, что на нём появилось огромное количество „мусора“, в том числе порнографического содержания. Из-за этого многие геймеры терпеть не могут RPG Maker. И эта дурная слава будет преследовать даже качественные проекты. Игры на этом движке очень узнаваемы. Ещё могу отметить тот факт, что движок подходит для создания пошаговых RPG и даже квестов. Игры других жанров в теории тоже можно сделать (я даже видел симпатичный beat ’em up), но это равносильно забиванию гвоздей отвёрткой вместо молотка».
Кирилл Пестряков, инди-разработчик (Heroines of Swords & Spells)
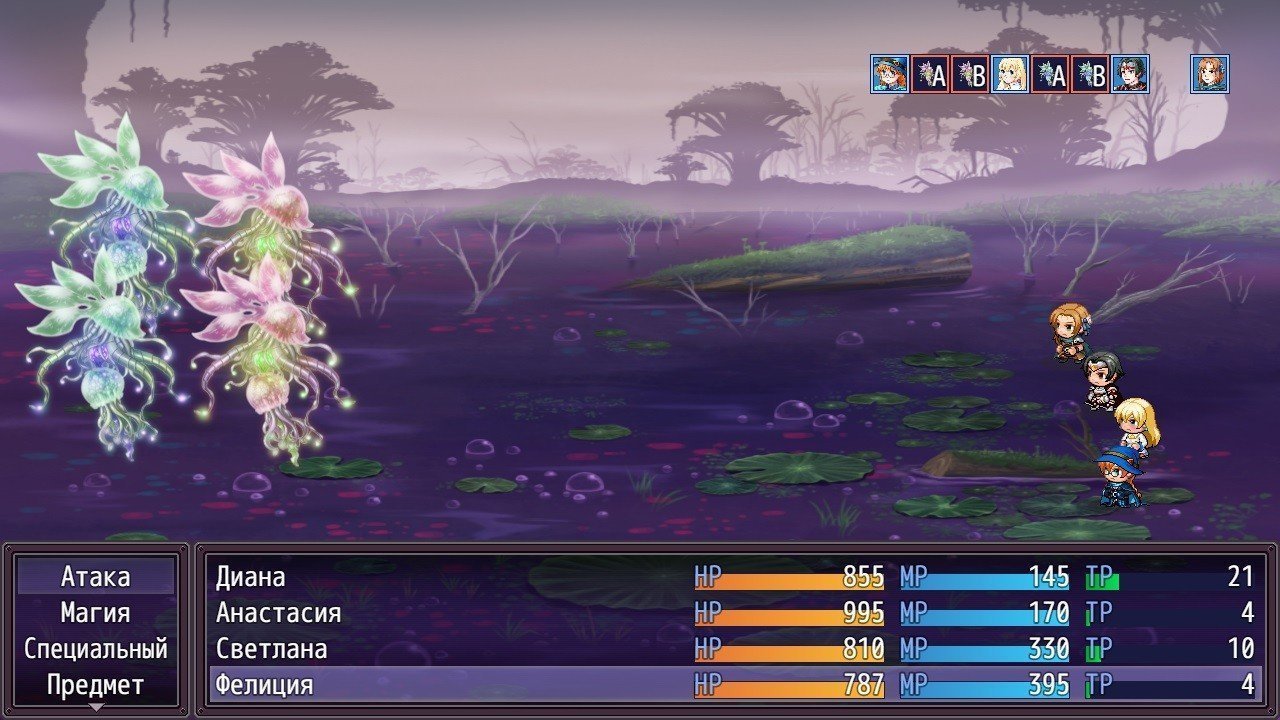
Скриншот из Heroines of Swords & Spells — игры, созданной на RPG Maker. Скриншот: игра Heroines of Swords & Spells / Steam
CHAINED ACCESSORS
Another change to GML is the ability to chain accessors. Much like you can now chain arrays together, you can chain the different Data Structure accessors together too, making accessing the data from nested structures much easier.
A simple example of this would be a DS grid, where each grid entry is a ds list. Previously you’d have to first retrieve the index of the list from the grid, and then access the data in the list, but now it’s as simple as doing something like this:
This would retrieve the data from the 6th position in the DS list that is being held in the grid (0, 0) position. Other examples of use are:
C:\Windows\Fonts\MySql
Есть небольшая вероятность, что ваша ошибка выглядит вот так:
IDE Exception: System.UnauthorizedAccessException: Access to the path 'C:\WINDOWS\Fonts\Mysql' is denied.
  at System.IO.__Error.WinIOError(Int32 errorCode, String maybeFullPath)
  at System.IO.FileSystemEnumerableIterator`1.AddSearchableDirsToStack(SearchData localSearchData)
  at System.IO.FileSystemEnumerableIterator`1.MoveNext()
  at System.Collections.Generic.List`1..ctor(IEnumerable`1 collection)
  at System.IO.Directory.GetFiles(String path, String searchPattern, SearchOption searchOption)
  at YoYoStudio.Graphics.FontManager.ValidateFontFolder(String _folderpath)
  at YoYoStudio.IDE.Initialise(String[] _args, Int32 _initialWidth, Int32 _initialHeight)
  at YoYoStudio.IDE.Execute(String[] _args, Int32 _initialWidth, Int32 _initialHeight)
Возможно, по тексту ошибки у вас уже возникают вопросы о том, почему в вас в системной папке
шрифтов MySQL и почему к нему нет доступа — даже с правами администратора.
Способы нахождения бед на свою голову разнятся(согласно опросу спрашивающих о проблеме пользователей в группе по GameMaker в ВК):
- Кто-то скачал проверенный активатор Windows, с которым никогда не было проблем(никогда такого не было, и вот опять)
- Кто-то скачал репак старых игр
- Несколько человек купили различные ноутбуки с предустановленной Windows в магазине ДНС,
поставили первым делом GameMaker, и обнаружили проблему.Пользуется ли кто-то в ДНС Доверенным Активатором, или же кто-то решил подзаработать
добавлением на продаваемые компьютеры Дополнительного ПО — пока остается секретом.
YoYo Games ответили, что,
хоть и можно добавить сделать, чтобы программа не крахалась из-за данной беды,
текущее поведение кажется предпочтительным, так как пользователю
желательно устранить проблемы такого масштаба до использования программы.
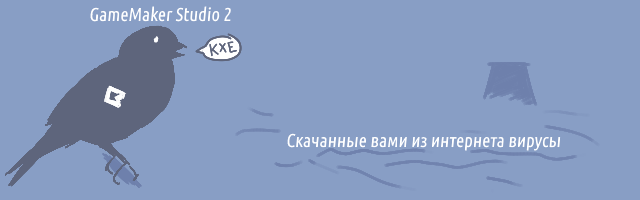
Итого, на данный момент GameMaker Studio 2 выступает эдакой «канарейкой в угольной шахте» —
его внезапная кончина может вам дать знать о том, что с вашей системой что-то очень не так до
того, как вы бы заметили это самостоятельно.
Возможности
Структура игры, созданной в программе Game Maker, состоит из набора разнообразных объектов. Их дизайн редактируется с помощью спрайтов, а поведение описание реакции на те или иные действия игрока. Процесс создания напоминает работу с блок-схемами и использует режим drag-n-drop (перетаскивание специальных иконок с действиями в ячейки событий). Для совсем опытных юзеров создан свой собственный язык GML (напоминающий JavaScript). Он поддерживает синтаксис популярных языков (PHP, JS, Pascal), поэтому для написания кода можно использовать один из них. Это значительно расширяет возможности пользователя.
Программа имеет встроенный редактор позволяющий настроить поведение и внешний вид объектов, создать различные цели, которые надо выполнить игрокам, задать время для этого.
Обновление добавило поддержку HTML5. Это позволило разрабатывать приложения не только для компьютеров и мобильных телефонов, но и интернет браузеров.
Основные возможности:
- создание двухмерных игр без знания основ программирования;
- возможность использования режима drag-n-drop (дословный перевод – перетаскивай и бросай);
- использование собственного скриптового языка GML (Game Maker Language), похожего на JavaScript;
- создание собственных библиотек действий с помощью Library Maker.
Быстро и без особых усилий можно создать простую игру со своими правилами и целями. Благодаря этой программе пользователь может получить новые навыки и проявить творческие способности, даже без глубоких знаний языков программирования. Специалисты используют дополнительные скрипты, чтобы расширить возможности GM. Начинающие программисты используют ее для расширения своих знаний и получения опыта в сфере создания игр.
Встроенная система звуков поддерживает различные форматы аудиофайлов, но дополнительно созданы специальные DLL библиотеки. Можно добавлять фоновую музыку или эффекты.
Системные требования очень простые и позволяют запустить GM на системах с операционной системой Windows XP и выше. Качественный русификатор позволит без проблем использовать все возможности и функции, а простой и дружественный интерфейс – быстрее разобраться даже неопытным пользователям.
THE MARKETPLACE
The new GameMaker: Marketplace permits you to buy and sell (or give away for for free!) assets and extensions. It has been designed to be as easy to use as possible and you will find that in 1.4 you have a new «Marketplace» menu option in the IDE. From there you can log in to the Marketplace and create, download, and manage all your asset packages. These packages can contain anything that you wish, including scripts, extensions, audio, sprites — basically anything that can be used as a resource in your games can be bundled as a package and uploaded to the Marketplace.

It is worth noting that Standard GMS users can access the Marketplace to buy or download asset packages, but to upload them you are required to have the Pro version of GMS. You can find all the information about the GameMaker: Marketplace (including guides on how to prepare your assets and upload them) from the YoYo Games Helpdesk.
Для начинающих
Game maker studio подойдет для амбициозных людей с интересными идеями по созданию прототипа игры. Сейчас большая проблема хорошей идеи для создания игры является в её реализации, так как для этого необходимо знания языков программирования. Этот движок даёт возможность создания игры без прибегания к программированию, написанию скриптов.
Очень хорошо подойдет для первого тестового создания механики задуманной игры, так как главное для начала понять интересен ли будет сам gameplay, и только после тестирования можно будет приступать к подробному созданию и улучшению графической части игры. Вот для таких целей и подойдет Game maker studio, она даёт возможность быстро и легко реализовать такого рода задачу.
Drag and Drop (DnD ) это графическая среда разработки, которая идеально подходит для начинающих или тех, кто более визуально или художественно ориентированы. С помощью DnD возможно создать игры без написания скриптов, используя только интерфейс программы.
Так же для начинающих в работе Game maker studio поможет русифицированный интерфейс, который можно найти на форумах этого движка. На официальном так же присутствует большое количество документации и инструкций по работе с движком.
ARRAYS
The first change to the GameMaker language that we want to discuss is a change to how arrays work. Previously, GML only permitted 1D or 2D arrays, eg:
However, this is no longer the case and now all arrays are 1D. So how do we create a 2D array now? Well this is done by chaining arrays together to essentially create arrays within arrays. Here is a small example:
The above is now a multi-dimension array with 2 dimensions to it, but you are no longer limited to just 2 dimensions and can create arrays of 3 or 4 or more dimensions as required, eg:
This change means that all platforms will now work the same (including HTML5) and enables much larger arrays, both in number of items as well as number of dimensions. The change also means that the following functions have been deprecated:
And the following new functions have been added:
Note that the old functionality (and the deprecated functions mentioned above) will still work but under no circumstances should new projects use the old syntax, as these will eventually be removed from the language.
Обучение GameMaker: Studio
GM:S предлагает два различных способа создавать игры. Первый это так называемый интерфейс Drag and Drop (сокращённо DnD). Он довольно мощный и позволяет создавать сложную логику. Однако, он не такой мощный, как второй вариант: использование языка программирования GameMaker Language (сокращённо GML). GML — это прекрасный язык сценариев, который может делать все, что может делать DND, и многое другое.
Начало работы
После того, как
вы загрузили версию движка GM:S которая соответствует вашим потребностям, вам следует ознакомиться с учебными материалами,
которые поставляются вместе с GM:S. Их можно найти во вкладке Tutorials после того, как вы откроете GM:S.
В начале уроков будет показано, как использовать drag and drop интерфейс, а более поздние руководства начинают охватывать язык программирования GML. Самое приятное в предложенных уроках — это то, что они фактически добавляют окно к
интерфейсу, в котором вы узнаете, как создавать каждую игру, поэтому вам
не нужно обращаться к веб-странице — все доступно изложено для вас в GM:S!
Я рекомендую
проработать столько, сколько вам нужно, до тех пор, пока вы не
почувствуете, что у вас есть четкое представление об общем процессе
работы и инструментах, которые предлагает движок GM:S. Дополнительные уроки вы можете найти на вики сайте YoYo games по адресу http://wiki.yoyogames.com/index.php/GameMaker:Studio_Tutorials включая некоторые более продвинутые руководства.
Для самого продвинутого обучения можно посмотреть демки на вкладке Demos после запуска GM:S. Они не откроют окно обучения, но они предоставляют доступ ко всему используемому исходному коду, чтобы можно было просматривать его, запускать отладчик и наблюдать за тем, что происходит, так что вы получите хорошее представление как использовать их методы в своих играх.
Руководство
Руководство по GM:S можно найти в меню Help в разделе Contents…. Это должно быть первым местом, где вы будете искать ответы на свои вопросы, если сразу перейти на форумы, люди по всей вероятности огорчат вас за то, что вы просто не проверили справку. Существует также онлайн-руководство, которое можно найти по адресу docs.yoyogames.com
Руководство в программе GM:S
Если вы выполняете поиск как в прилагаемом руководстве, так и в онлайн-руководстве и не можете найти ответы, не бойтесь! На reddit существует большое сообщество /r/gamemaker и есть официальные форумы. Кроме того, имеется отличный сайт полон инди-разработчиков, некоторые из них часто используют GM:S на форумах TIG. Эти сообщества полны полезных людей, поэтому не бойтесь задавать свои вопросы!
Features of Game Maker Studio 2
Backward Compatible
Import your GameMaker Studio free projects directly into Studio 2 and have them ready to run in a matter of minutes.
YoYo Account
GameMaker Studio 2 uses your YoYo Account to provide a single login for all your game making needs.
Tutorials
With the integrated tutorials, you can have your learning materials docked directly in your workspace.
Laptop Mode
For all users who develop on laptop pcs would have developed an efficient workflow that does not get in the way of development.
Skinning
Customize your game development environment by choosing from predefined skins or creating your own.
Docking
Organize your workspace by docking your tool windows where you want them.
Object Editor
With the unique structure and workflow, it has never been easier to manage the objects within your game.
Script Editor
With tabs and the ability to split the editor, you can work with multiple files without having a window for each.
Superior Workflow
Drag and Drop like never before, create the game you want without ever writing any code.
Library
Choose what you need from an extensive library of events and actions to sculpt the game you desire.
Code Preview
Learn how to program by viewing the code behind our DnD actions and take your games to the next level.
GameMaker Language
Based on the C programming language, GML gives you all the power of other programming languages while being easy to learn.
Layers
Take control of how objects are ordered within your rooms and draw sprites directly without the need for an object.
Tile Brushes
Make repetition a breeze by creating a group of tiles and drawing them directly to the room.
Inheritance
Add variety quickly to your projects by sharing common code and resources.
Brush Based Editing
Create a brush from any section of your image simply and efficiently with our amazing new editor.
Animation Support
Bring your sprites to life with a touch of motion and take your games to the next level.
Tileset Animations
Liven up your levels with a hint of animation without compromising on performance.
Brushes
Improve your workflow by creating a palette of commonly used tiles.
Auto Tiling
Automatically choose the correct tile for the job and never have to worry what goes where again.
GoTo Finder
The GoTo Finder lets you search for, locate, and open any resource within your project instantly.
Chain View
Easily navigate between resources without losing track of where you are.
Git Integration
Save and back-up your project history from anywhere in the world with our Git integration.
Debugger
Save time and effort with our powerful debugger.
In-App Purchases
Free games can make you money. GameMaker’s support for adverts and in-app purchases allow you to monetize your game without having to charge a premium.
Push Notifications
Deliver updates and notifications directly to your players using GameMaker’s support for push notifications.
Sound Mixer
Give players the best experience by immersing them in high-quality audio.
Networking
This Game development engine allows you to structure your game to work with a client/server model, dealing with all of the network management behind the scenes, while allowing you to focus on the game itself.
Extensions
- Extend the power of GameMaker by incorporating third-party libraries and SDKs.
- Marketplace:
- The one-stop-shop for developers to access all of the amazing game making resources created by members of the GameMaker community.
FUNCTIONS, SCRIPTS AND METHOD VARIABLES
Above we outline some changes to the GameMaker Language, but now it’s time to talk about the good stuff… what’s been added! To start with we want to talk about in-line functions and scripts. Previously, a script was a single resource that was created on a global scope and used to create a single custom function which would then be called using the script name as the function name. This is no longer the case and scripts, while still global in scope, are now a type of «container» for one or more functions.
What this means is that when you compile your project, scripts are no longer called individually, but are actually all run at the start of the game in the global scope, so all variables that are defined in the script (outside of function definitions) will be considered global. That said, you should still use the identifier to explicitly define and identify global variables in your code.
The reason for this change is that scripts can now contain multiple functions. If you’ve only used GML to code projects then the idea of functions may be something new to you, but think of them as being the same as scripts, only explicitly assigned to a variable. This variable is called a method and is used to call the code that is in the function, the same as you would have previously called the script name. This is easier to visualise with an example, so let’s look at one. Consider this simple script :
Now, however, this would be defined as a function like this:
or like this:
You would call this function just as you would have called the script:
So, as we mentioned above, scripts can now contain multiple functions and these should be defined with the format shown above where you have the JS doc comment to identify the function, then the function definition below, and then the next JS Doc comment, and then the function, etc…

Above, we briefly mentioned that functions as variables were called method variables, but it should be explained in a bit more detail. Basically, when you create a function with a variable like this, you are creating a method variable, and they can have different scopes. Consider this function:
-
In the case of a script a variable called «foo» is declared at global scope
-
If the function is declared in an event then the variable «foo» is on the instance that ran that event
-
If the function is declared in an event using the keyword then the variable «foo» is local to the event only
-
If «foo» is declared inside a then it is declared on the that is active at that time
This means that if you have some code that you need to use only within a loop in an alarm event (for example), then you can define it as a local scope method variable at the start of the event and then use it within the loop without the need to clutter up the script assets with it.
It is worth noting that while the variable will be in the chosen scope, the actual function will be bound to the scope that it was initially defined in. Going back to script functions, these are all global scope and are considered «unbound» (ie: they are not associated with any instances), but if you have a script function that creates another function within it and then you call this script from an instance, the function used within the script will be bound to the instance. In general this is not something you ever need to think about but for more complex operations with method variables it’s worth taking into consideration. This also applies when using other constructs like — when you create a method variable inside a , the function will be bound to the instance that is currently in scope.
The following new functions have also been added to deal with methods:
Check the manual for details fo how these functions should be used.
EXCEPTIONS, TRY, CATCH AND FINALLY
The final new language feature that has been added in the 2.3 update that we want to discuss here is the ability to control to a much greater degree how errors are handled when they are encountered in your code as well as the ability to generate your own error messages.
To start with we have the new operator, which — as the name implies — can be used to «throw» a runtime error message. This has the following syntax:
The expression used can be a value or a string or any other data type, and this will then generate an exception error which is — by default — shown on the screen, and on closing the error message the game will end. For example calling this:
will cause the following unhandled exception error to be shown:

This is the default way the error can be handled, but you can «take over» this error message and use your own handler code by calling the new function . This runtime function permits you to supply a custom method to use that will be called whenever any unhandled exceptions occur in your game.
Apart from the ability to throw your own errors and handle them using functions, we also have the new , , and operators. These can be used in your game for error checking and permit you to test out blocks of code and control what happens if any runtime exceptions occur. Using these will prevent the exception ending the game and will also prevent showing the standard error message to the user, but this means that you will have to handle what happens next in this case, like — for example — saving out log files and ending the game gracefully (note that if you choose to do nothing, your game may become unstable and not perform correctly).
At it’s most basic the syntax is as follows:
However, having a without anything to actually handle any exceptions the code may produce will not be very helpful, so we usually pair it with a , with the following syntax:
What does is permit you to run extra code supplied in the following block when an exception from the previous has been caught. If this is a runtime exception, then the supplied variable can be used to access a struct which will contain the following information:
A simple example of use is shown below:
It may be that you want to run some code regardless of whether an exception was thrown or not, and so for that you can add in a block. The syntax is:
It is worth noting that you can have any combination of these together, ie: / , / or / / , and that within the block you cannot use , , or statements as they have no meaning in this context and the compiler will generate an error if they are used.
Установка русификатора
Для начинающих лучше будет установит русскоязычный интерфейс, чтобы проще ориентироваться. Для этого необходимо скачать файл русификатор, ссылка на который есть выше.
После того как скачали файл русского языка, копируем его и вставляем в директорию с Платформой в папку «Languages» которая лежит по следующему пути C:\Program Files\GameMaker Studio 2\Languages
Открываем вставленный файл в блокноте, для этого нажимаем на него правой кнопкой и выбираем пункт «Изменить».
Откроется блокнот с конфигурацией этого файла. Нам необходимо 7-й строкой вставить следующую конфигурацию.
_LanguageCode,ru,ru,,standard windows os language code this pack represents (can be primary code only ie. en or primary-secondary ie. ru-RU)
Сохраняем файл и делаем бэкап стандартного файла «english», для этого просто скопируйте его в другую папку. Это необходимо для того, если что-то пойдет не так, просто скопировать его обратно и вернуть исходный язык движка. После сохранения русскоязычного файла удаляем старый англоязычный (предварительно сохраненный в другую папку) и запускаем Game maker studio.
Особенности программы Game Maker Studio
- Последняя версия конструктора дает возможность создавать расширения для большого количества платформ на соответствующих языках программирования.
- Game Maker имеет все необходимые компоненты для того, чтобы создаваемые игры запускались на iOS, Xbox, Windows PC & Phone, Linux, Android, PS4, PSVita, HTML5.
- Имеется поддержка шейдеров для эффективного управления процессом отрисовки, преобразований и графических эффектов.
- Внедрено огромное число математических функций для обработки векторных и скалярных величин.
- Используется компилятор кода, что позволяет увеличить производительность в играх.
- Внедрена поддержка множества сервисов для монетизации.
- Имеются опции для отладки в специализированном окне The Debug Module.
- Программа поддерживает большое число библиотек и расширений на всевозможных языках.
- Существует бесплатная и платная версии конструктора.
- Разработчики позаботились о создании собственного языка программирования, схожем с C++ и Pascal.
- Имеется поддержка работы с трехмерной графикой, однако её использование весьма неудобно.
- Недостатком данного продукта является возможность его использования исключительно на платформе Windows.
Итоги обзора Game maker studio
Плюсы:
- Поддержка работы и создания проектов в графическом интерфейсе.
- Кроссплатформенность.
- Гибкая ценовая категория.
- Собственный язык программирования.
- Интеграция со Steam.
- Поддержка множества интернет-площадок.
- Поддержка шейдеров.
- Поддержка работы с сетью.
- Интеграция с Facebook.
- Возможность установки русификатора.
- Большое количество документации.
- Поддержка и официальный форум.
- Собственный магазин инструментов.
- Совместимость с проектами, сделанными на более поздних версиях Game maker studio.
Минусы:
- Плохо оптимизирован для некоторых платформ.
- Плохо реализован инструмент создания 3D игр.
- Нет встроенного русскоязычного интерфейса.
- Большие ограничения при использовании бесплатной версии (на то она и бесплатная).