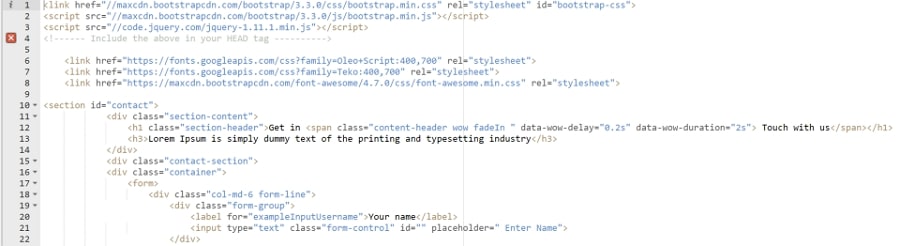
Начинающему веб-мастеру: делаем одностраничник на bootstrap 4 за полчаса
Содержание:
- Текст формы
- Наводим блеск
- Required Fields
- Фрагменты
- Input Group Buttons
- Вертикальная форма (по умолчанию)
- Disabled state
- Usage
- Sass
- Form Styles
- Сообщество
- Bootstrap Radio Buttons
- Best Bootstrap Contact Form Templates [Free download]
- Disabled forms
- How it works
- Best Bootstrap Registration/Signup Form Templates [Free download]
- Текст справки
- Disabled forms
- Input Group with Dropdown Button
- CSPs and embedded SVGs
- Доступность
- Глобально важно
Текст формы
Текст формы на уровне блока или на уровне строки может быть создан с помощью .
Связывание текста формы с элементами управления формой
Текст формы должен быть явно связан с элементом управления формы, к которому он относится, с помощью атрибута . Это гарантирует, что вспомогательные технологии, такие как программы чтения с экрана, будут объявлять этот текст формы, когда пользователь фокусируется или входит в элемент управления.
Текст формы под полями может быть оформлен с помощью . Если будет использоваться элемент уровня блока, добавляется верхнее поле для удобного разнесения между входными данными выше.
Встроенный текст может использовать любой типичный строчный HTML-элемент (будь то , или что-то еще) с не более чем классом .
Наводим блеск
Теперь мы сконцентрируемся на обеспечении обратной связи с пользователем с помощью различных дополнительных функций, которые можно включить. В частности, мы рассмотрим обратную связь формы с помощью обработки ошибок, как на стороне клиента, так и на стороне сервера.
Также для валидации формы мы используем некоторые инструменты:
- Animate.css;
- Bootstrap Validator.
Добавьте их в проект, как мы ранее делали с Bootstrap и JQuery. Эти инструменты помогут обеспечить обратную связь с пользователем после того, как он отправил данные.
Структура проекта теперь должна выглядеть следующим образом:
Required Fields
A label that is associated with a required field is automatically annotated with
a CSS class. doesn’t provide any styling for required fields. You’re free to add any appropriate CSS to style
required fields as desired. One example would be to automatically add an
asterisk to the end of the label:
label.requiredafter {
  content" *";
}
The label class is determined based on the definition of a presence
validator with the associated model attribute. Presently this is one of:
ActiveRecord::Validations::PresenceValidator or
ActiveModel::Validations::PresenceValidator.
In cases where this behaviour is undesirable, use the option to force the class to be present or absent:
<%= f.password_field :login, label: "New Username", required: true %>
<%= f.password_field :password, label: "New Password", required: false %>
Фрагменты
Общие шаблоны для создания сайтов и приложений, основанных на существующих компонентах и утилитах с настраиваемым CSS и т.д.

Отобразите свой брендинг, навигацию, поиск и многое другое с помощью этих компонентов заголовка.
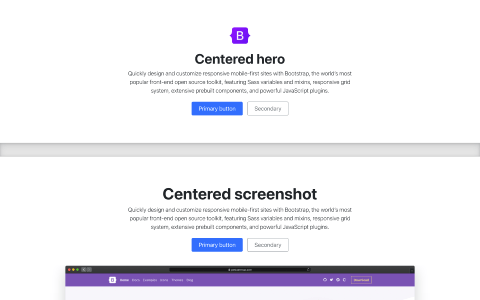
Создайте сцену на своей домашней странице с помощью героев с четкими призывами к действию.
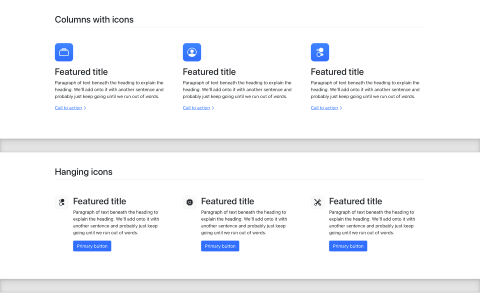
Объясните особенности, преимущества или другие детали Вашего маркетингового контента.
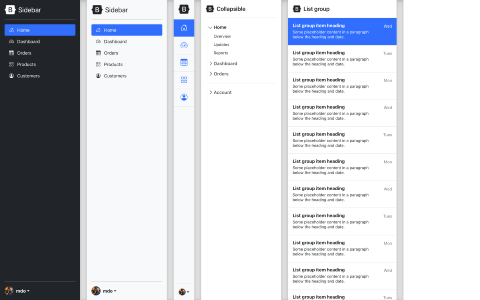
Общие шаблоны навигации идеально подходят для макетов вне холста или нескольких столбцов.
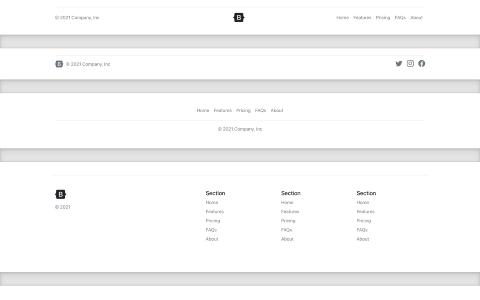
Завершите каждую страницу потрясающим нижним колонтитулом, большим или маленьким.
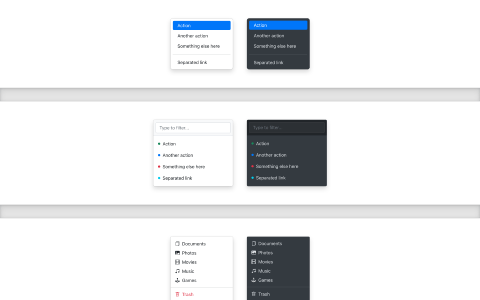
Расширьте свои раскрывающиеся списки с помощью фильтров, значков, настраиваемых стилей и многого другого.
Расширяйте группы списков с помощью утилит и настраиваемых стилей для любого контента.
Input Group Buttons
Basic Button
Go
OK
Cancel
Example
<div class=»input-group mb-3″> <div class=»input-group-prepend»>
<button class=»btn btn-outline-primary» type=»button»>Basic Button</button>
</div> <input type=»text» class=»form-control»
placeholder=»Some text»></div><div class=»input-group mb-3″>
<input type=»text» class=»form-control» placeholder=»Search»> <div
class=»input-group-append»> <button class=»btn btn-success»
type=»submit»>Go</button> </div></div><div
class=»input-group mb-3″> <input type=»text» class=»form-control»
placeholder=»Something clever..»> <div class=»input-group-append»>
<button class=»btn btn-primary» type=»button»>OK</button>
<button class=»btn btn-danger» type=»button»>Cancel</button> </div>
</div>
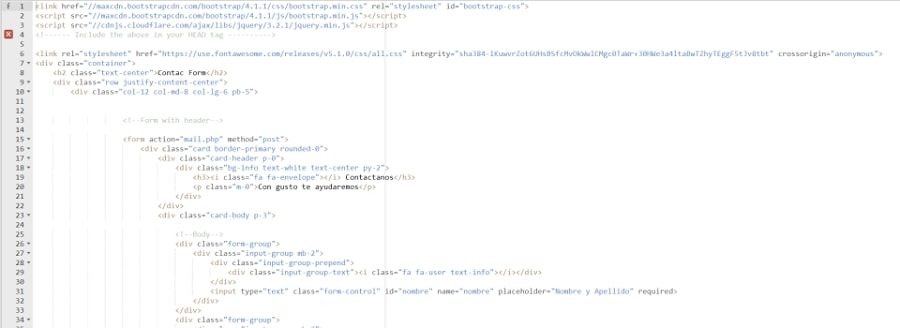
Вертикальная форма (по умолчанию)
Вертикальная форма — это макет формы, в которой её элементы располагаются вертикально, т.е. один под другим. Данная
форма создаётся без добавления класса к элементу формы (). Метки и элементы управления формы
необходимо размещать в блоке с классом .
<form>
  <div class="form-group">
    <label for="inputEmail">Адрес email:</label>
    <input type="email" class="form-control" id="inputEmail" placeholder="Введите email">
  </div>
  <div class="form-group">
    <label for="inputPassword">Пароль:</label>
    <input type="password" class="form-control" id="inputPassword" placeholder="Введите пароль">
  </div>
  <div class="checkbox">
    <label>
      <input type="checkbox"> Запомнить
    </label>
  </div>
  <button type="submit" class="btn btn-default">Войти</button>
</form>
Disabled state
Make buttons look inactive by adding the boolean attribute to any element. Disabled buttons have applied to, preventing hover and active states from triggering.
Primary button
Button
Disabled buttons using the element behave a bit different:
- s don’t support the attribute, so you must add the class to make it visually appear disabled.
- Some future-friendly styles are included to disable all on anchor buttons.
- Disabled buttons should include the attribute to indicate the state of the element to assistive technologies.
Link functionality caveat
The class uses to try to disable the link functionality of s, but that CSS property is not yet standardized. In addition, even in browsers that do support , keyboard navigation remains unaffected, meaning that sighted keyboard users and users of assistive technologies will still be able to activate these links. So to be safe, in addition to , also include a attribute on these links to prevent them from receiving keyboard focus, and use custom JavaScript to disable their functionality altogether.
Usage
bootstrap_form_for
To get started, use the helper in place of the Rails helper. Here’s an example:
<%= bootstrap_form_for(@user) do |f| %>
  <%= f.email_field :email %>
  <%= f.password_field :password %>
  <%= f.check_box :remember_me %>
  <%= f.submit "Log In" %>
<% end %>
This generates the following HTML:
<form accept-charset="UTF-8" action="/users" class="new_user" id="new_user" method="post">
  <div class="form-group">
    <label for="user_email">Email</label>
    <input class="form-control" id="user_email" name="user" type="email">
  </div>
  <div class="form-group">
    <label for="user_password">Password</label>
    <input class="form-control" id="user_password" name="user" type="password">
  </div>
  <div class="form-check">
    <input name="user" type="hidden" value="">
    <input class="form-check-input" id="user_remember_me" name="user" type="checkbox" value="1">
    <label class="form-check-label" for="user_remember_me">Remember me</label>
  </div>
  <input class="btn btn-secondary" name="commit" type="submit" value="Log In">
</form>
bootstrap_form_tag
If your form is not backed by a model, use the . Usage of this helper is the same as , except no model object is passed in as the first argument. Here’s an example:
<%= bootstrap_form_tag url: '/subscribe' do |f| %>
  <%= f.email_field :email, value: 'name@example.com' %>
  <%= f.submit %>
<% end %>
bootstrap_form_with
Note that in Rails 5.1 does not add IDs to form elements and labels by default, which are both important to Bootstrap markup. This behaviour is corrected in Rails 5.2.
To get started, just use the helper in place of . Here’s an example:
<%= bootstrap_form_with(model: @user, local: true) do |f| %>
  <%= f.email_field :email %>
  <%= f.password_field :password %>
  <%= f.check_box :remember_me %>
  <%= f.submit "Log In" %>
<% end %>
This generates:
<form role="form" action="/users" accept-charset="UTF-8" method="post">
<input name="utf8" type="hidden" value="✓" />
<div class="form-group">
<label class="required" for="user_email">Email</label>
<input class="form-control" type="email" value="steve@example.com" name="user" />
</div>
<div class="form-group">
<label for="user_password">Password</label>
<input class="form-control" type="password" name="user" />
<small class="form-text text-muted">A good password should be at least six characters long</small>
</div>
<div class="form-check">
<input name="user" type="hidden" value="">
<input class="form-check-input" id="user_remember_me" name="user" type="checkbox" value="1">
<label class="form-check-label" for="user_remember_me">Remember me</label>
</div>
<input type="submit" name="commit" value="Log In" class="btn btn-secondary" data-disable-with="Log In" />
</form>
supports both the and use cases
in .
Sass
When using Bootstrap’s source Sass files, you have the option of using Sass variables and mixins to create custom, semantic, and responsive page layouts. Our predefined grid classes use these same variables and mixins to provide a whole suite of ready-to-use classes for fast responsive layouts.
Variables
Variables and maps determine the number of columns, the gutter width, and the media query point at which to begin floating columns. We use these to generate the predefined grid classes documented above, as well as for the custom mixins listed below.
Example usage
You can modify the variables to your own custom values, or just use the mixins with their default values. Here’s an example of using the default settings to create a two-column layout with a gap between.
Main content
Secondary content
Form Styles
By default, your forms will stack labels on top of controls and your controls
will grow to 100 percent of the available width. This is consistent with Bootstrap’s «mobile first» approach.
Inline Forms
To use an inline-layout form, use the option. To hide labels,
use the option, which keeps your labels accessible to those
using screen readers.
<%= bootstrap_form_for(@user, layout: :inline) do |f| %>
  <%= f.email_field :email, hide_label: true %>
  <%= f.password_field :password, hide_label: true %>
  <%= f.check_box :remember_me %>
  <%= f.submit %>
<% end %>
To skip label rendering at all, use option.
<%= f.password_field :password, skip_label: true %>
Horizontal Forms
To use a horizontal-layout form with labels to the left of the control, use the
option. You should specify both and
css classes as well (they default to and ).
In the example below, the checkbox and submit button have been wrapped in a
to keep them properly aligned.
<%= bootstrap_form_for(@user, layout: :horizontal, label_col: "col-sm-2", control_col: "col-sm-10") do |f| %>
  <%= f.email_field :email %>
  <%= f.password_field :password %>
  <%= f.form_group do %>
    <%= f.check_box :remember_me %>
  <% end %>
  <%= f.form_group do %>
    <%= f.submit %>
  <% end %>
<% end %>
The and css classes can also be changed per control:
<%= bootstrap_form_for(@user, layout: :horizontal) do |f| %>
  <%= f.email_field :email %>
  <%= f.text_field :age, control_col: "col-sm-3" %>
  <%= f.form_group do %>
    <%= f.submit %>
  <% end %>
<% end %>
or default value can be changed in initializer:
# config/initializers/bootstrap_form.rb
module BootstrapForm
  class FormBuilder
    def default_label_col
      'col-sm-4'
    end
    def default_control_col
      'col-sm-8'
    end
    def default_layout
      # :default, :horizontal or :inline
      :horizontal
    end
  end
end
Control col wrapper class can be modified with . This option will preserve column definition:
<%= bootstrap_form_for(@user, layout: :horizontal) do |f| %>
  <%= f.email_field :email %>
  <%= f.text_field :age, add_control_col_class: "additional-control-col-class" %>
  <%= f.form_group do %>
    <%= f.submit %>
  <% end %>
<% end %>
Custom Field Layout
The form-level can be overridden per field, unless the form-level layout was :
<%= bootstrap_form_for(@user, layout: :horizontal) do |f| %>
  <%= f.email_field :email %>
  <%= f.text_field :feet, layout: :default %>
  <%= f.text_field :inches, layout: :default %>
  <%= f.form_group do %>
    <%= f.submit %>
  <% end %>
<% end %>
A form-level can’t be overridden because of the way Bootstrap 4 implements in-line layouts. One possible work-around is to leave the form-level layout as default, and specify the individual fields as , except for the fields(s) that should be other than in-line.
Custom Form Element Styles
The option can be used to replace the browser default styles for check boxes and radio buttons with dedicated Bootstrap styled form elements. Here’s an example:
<%= bootstrap_form_for(@user) do |f| %>
  <%= f.email_field :email %>
  <%= f.password_field :password %>
  <%= f.check_box :remember_me, custom: true %>
  <%= f.submit "Log In" %>
<% end %>
Сообщество
Будьте в курсе развития Bootstrap и обращайтесь к сообществу с помощью этих полезных ресурсов.
- Обсуждайте в чате Telegram @getbootstrap_ru.
- Читайте и подписывайтесь на Официальный блог Bootstrap.
- Присоединиться к официальной комнате Slack.
- Общайтесь с другими Bootstrappers в IRC. На сервере , в канале .
- Справку по реализации можно найти на сайте Stack Overflow (с тегом ).
- Разработчикам следует использовать ключевое слово в пакетах, которые изменяют или расширяют функциональность Bootstrap при распространении через npm или аналогичные механизмы доставки для максимальной узнаваемости.
Вы также можете следить за @getbootstrap в Твиттере, чтобы следить за последними слухами и потрясающими музыкальными клипами.
Bootstrap Radio Buttons
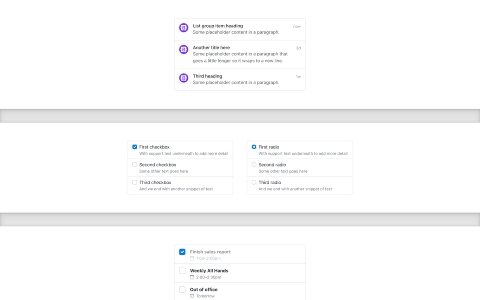
Radio buttons are used if you want to limit the user to just one selection
from a list of preset options.
The following example contains three radio buttons. The last option is disabled:
Example
<div class=»form-check»> <label class=»form-check-label»>
<input type=»radio» class=»form-check-input»
name=»optradio»>Option 1
</label></div><div class=»form-check»> <label
class=»form-check-label»> <input type=»radio»
class=»form-check-input» name=»optradio»>Option 2 </label></div>
<div class=»form-check disabled»> <label class=»form-check-label»>
<input type=»radio» class=»form-check-input» name=»optradio» disabled>Option 3
</label></div>
As with checkboxes, use the class if you want the
radio buttons to appear on the
same line:
Example
<div class=»form-check-inline»> <label class=»form-check-label»>
<input type=»radio» class=»form-check-input» name=»optradio»>Option 1
</label></div><div class=»form-check-inline»> <label
class=»form-check-label»> <input type=»radio»
class=»form-check-input» name=»optradio»>Option 2 </label></div>
<div class=»form-check-inline disabled»> <label class=»form-check-label»>
<input type=»radio» class=»form-check-input» name=»optradio» disabled>Option 3
</label></div>
Best Bootstrap Contact Form Templates [Free download]
18. Contact Form
Designer: Danlouis9701
This contact form based on Bootstrap can be used on any website. It has a special text input field to allow for open-ended comment.
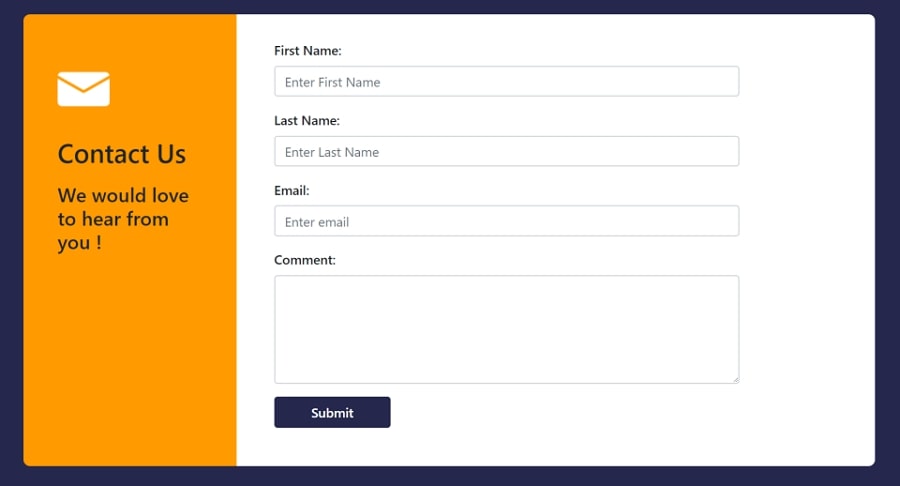
19. Bootstrap Contact Form
Designer: Kshiti06
This form uses yellow and white to create a nice contrast. It looks more appealing than all-white contact forms.

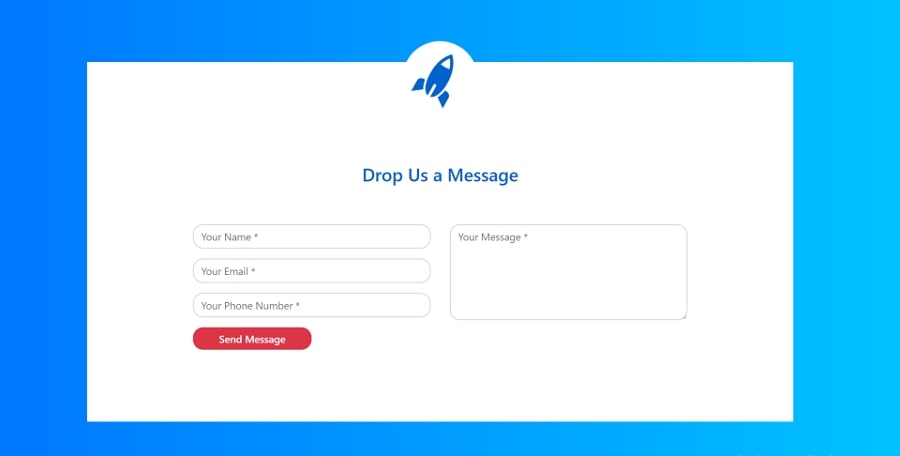
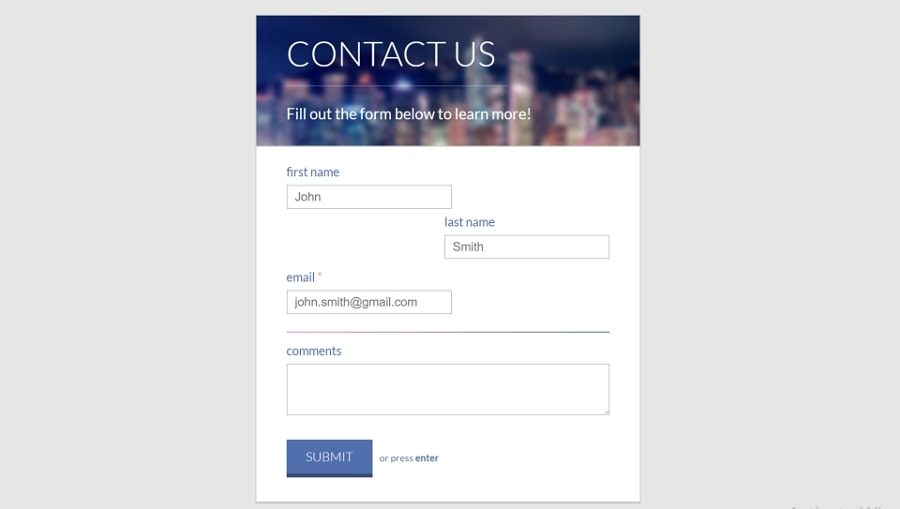
20. Bootstrap Contact Form
Designer: Kshiti06
It uses a gradient blue color as the background, which is a perfect complement to an all-white contact form. It uses placeholders to inform you of what you should input.
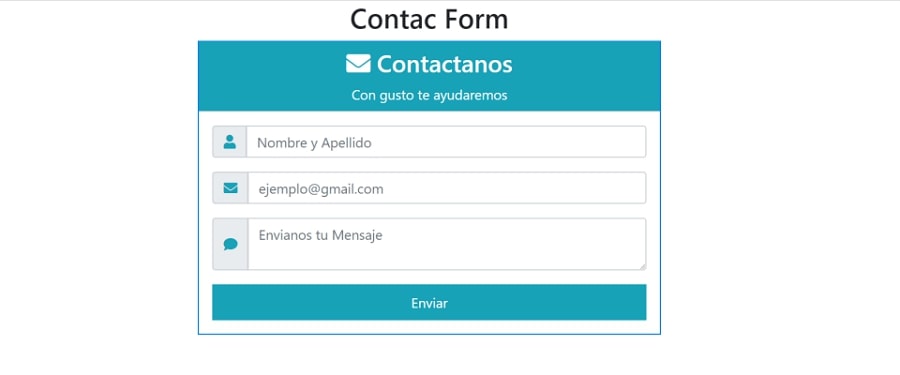
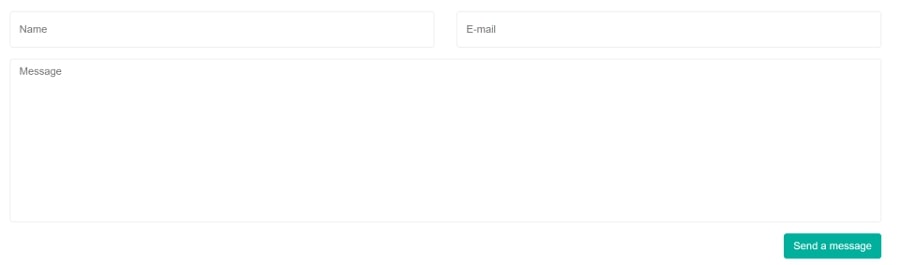
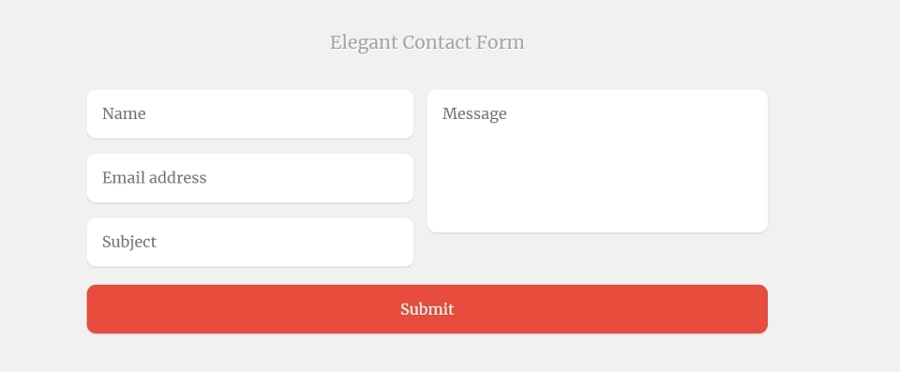
21. Contact Form — One page
Designer: Katya
It has a custom styled button with a nice icon. In addition, the rounded form spaces make it display perfectly on any web or mobile screen. The typography on the header is very powerful.

22. Contact Us Form with Validation
Designer: Mirchu
This is an all-white contact form with a custom-styled button with a solid green color. Bootstrap form validation is used in this form.

23. Bootstrap 3 Contact Form with Validation
Designer: Jay
- Built with Bootstrap 3
- Field validation with Bootstrap validator
This is a powerful contact form with multiple items, including input fields, checkboxes, radio buttons and a submit button.
Designer: Mark Murray
This form features:
- Round edges
- Large textboxes
- Custom styled submit button
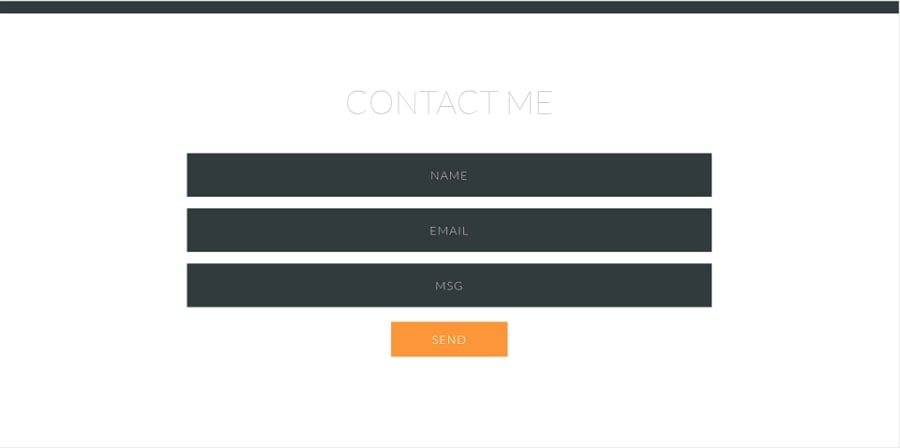
25. Clean Contact Form
Designer: Nick haskell
This form features:
- A fancy, concise, and delightful header
- Custom styled submit button
- The image and text encourages visitors to get in touch with you.
- Responsive form design
Designer: Stefan Rusu
Form features:
- Interactive layout
- Full-page contact form
- Simple and useful

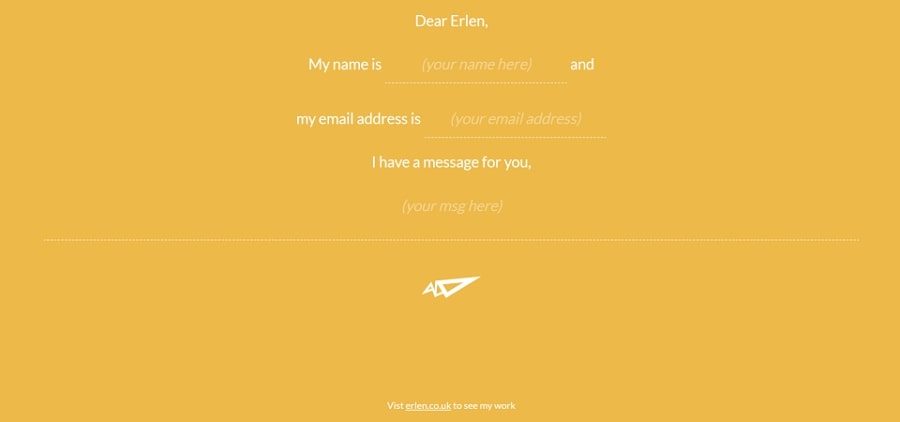
27. Quick Minimal Contact Form
Designer: Erlen
Form features:
- Clean color scheme
- Custom styled submit button
- Placeholder to inform what you should input
Designer: Chris Holder
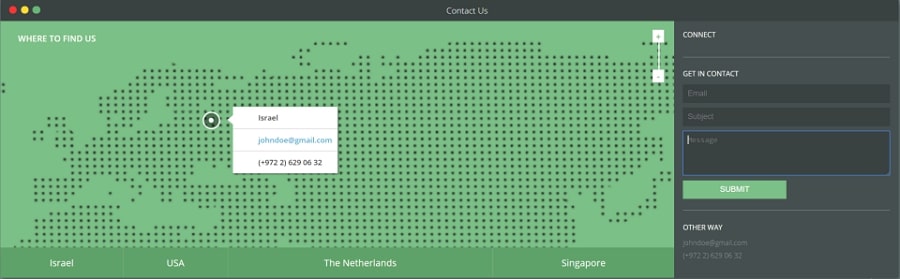
29. Responsive Contact Form with Map
Designer: Lentie Ward
Form features:
- Map background to provide an accurate reference of where you are
- Asymmetrical layout
- Excellent color scheme
- Large textboxes
30. Transparent Contact Form
Designer: Luis M Ruiz
Form features:
- Large textboxes
- Fully responsive contact form design
- Support customization
- Confiscated design

If you need more resources, there are 12 Best Free Html5 Contact Form & Contact Us Page Templates you shouldn’t miss.
Disabled forms
Add the boolean attribute on an input to prevent user interactions and make it appear lighter.
Add the attribute to a to disable all the controls within. Browsers treat all native form controls (, , and elements) inside a as disabled, preventing both keyboard and mouse interactions on them.
However, if your form also includes custom button-like elements such as , these will only be given a style of , meaning they are still focusable and operable using the keyboard. In this case, you must manually modify these controls by adding to prevent them from receiving focus and to signal their state to assistive technologies.
How it works
Breaking it down, here’s how the grid system comes together:
-
Our grid supports six responsive breakpoints. Breakpoints are based on media queries, meaning they affect that breakpoint and all those above it (e.g., applies to , , , , and ). This means you can control container and column sizing and behavior by each breakpoint.
-
Containers center and horizontally pad your content. Use for a responsive pixel width, for across all viewports and devices, or a responsive container (e.g., ) for a combination of fluid and pixel widths.
-
Rows are wrappers for columns. Each column has horizontal (called a gutter) for controlling the space between them. This is then counteracted on the rows with negative margins to ensure the content in your columns is visually aligned down the left side. Rows also support modifier classes to and gutter classes to change the spacing of your content.
-
Columns are incredibly flexible. There are 12 template columns available per row, allowing you to create different combinations of elements that span any number of columns. Column classes indicate the number of template columns to span (e.g., spans four). s are set in percentages so you always have the same relative sizing.
-
Gutters are also responsive and customizable. Gutter classes are available across all breakpoints, with all the same sizes as our margin and padding spacing. Change horizontal gutters with classes, vertical gutters with , or all gutters with classes. is also available to remove gutters.
-
Sass variables, maps, and mixins power the grid. If you don’t want to use the predefined grid classes in Bootstrap, you can use our to create your own with more semantic markup. We also include some CSS custom properties to consume these Sass variables for even greater flexibility for you.
Be aware of the limitations and bugs around flexbox, like the .
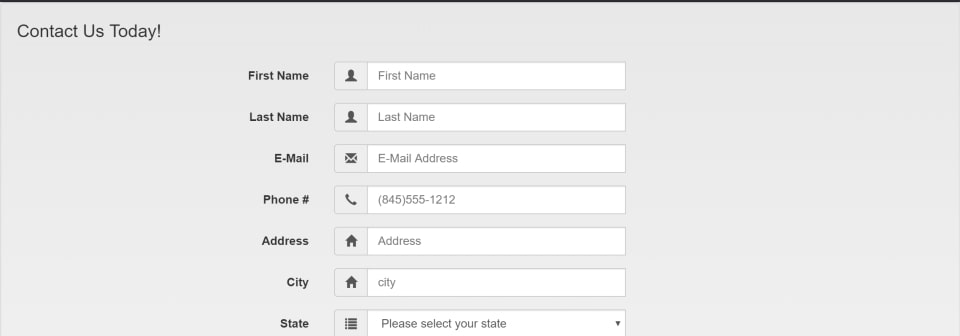
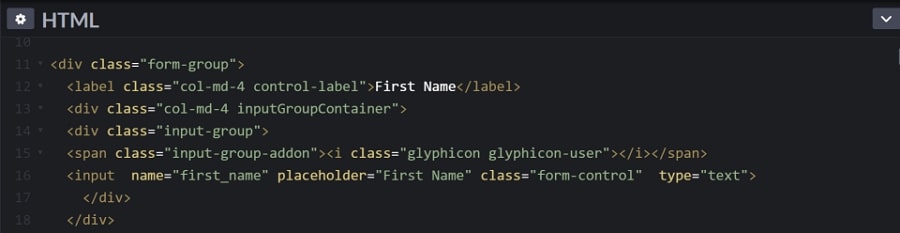
Best Bootstrap Registration/Signup Form Templates [Free download]
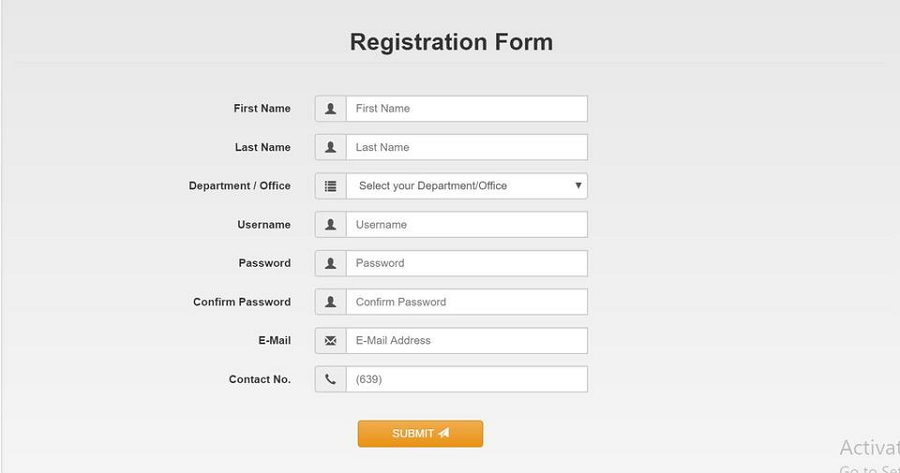
7. Sign Up Forms — Bootstrap 3 Registration Form with Validation
Designer: Juffrey Rodriguez
This is a long horizontal registration form with several input fields. There is a drop-down menu on the third line «Department/Office». In addition, the designer has added a small icon on each line to clarify the required input.

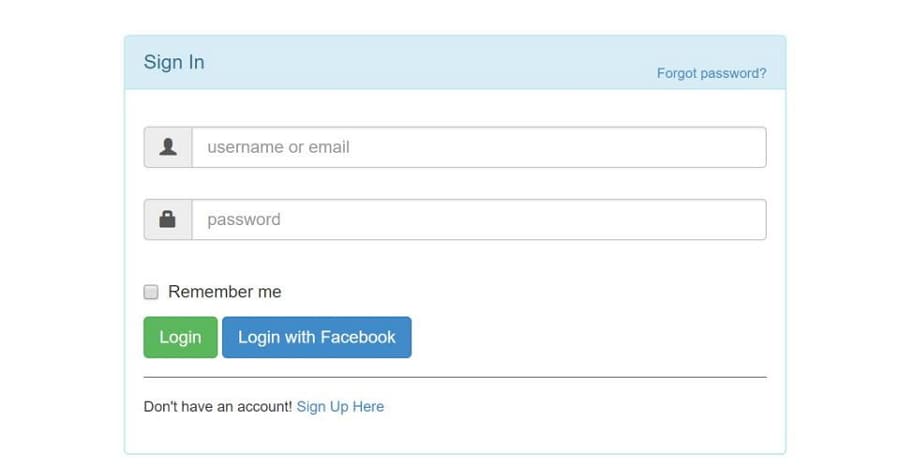
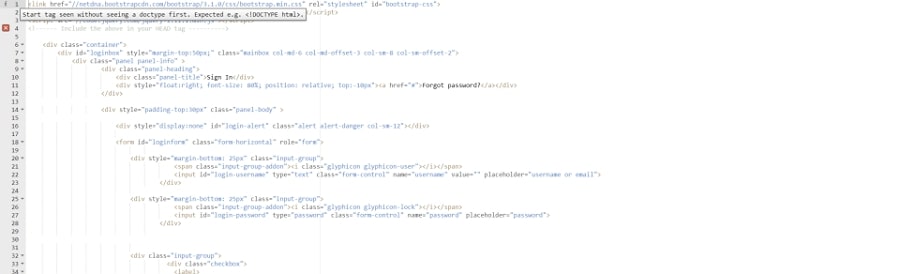
8. Login & Signup Forms in Panel
Designer: Calvinko
This form contains 2 input fields, a checkbox, two login buttons, a password refound CTA on the right top corner and a signup CTA on the bottom. All these make it a functional sign in form.
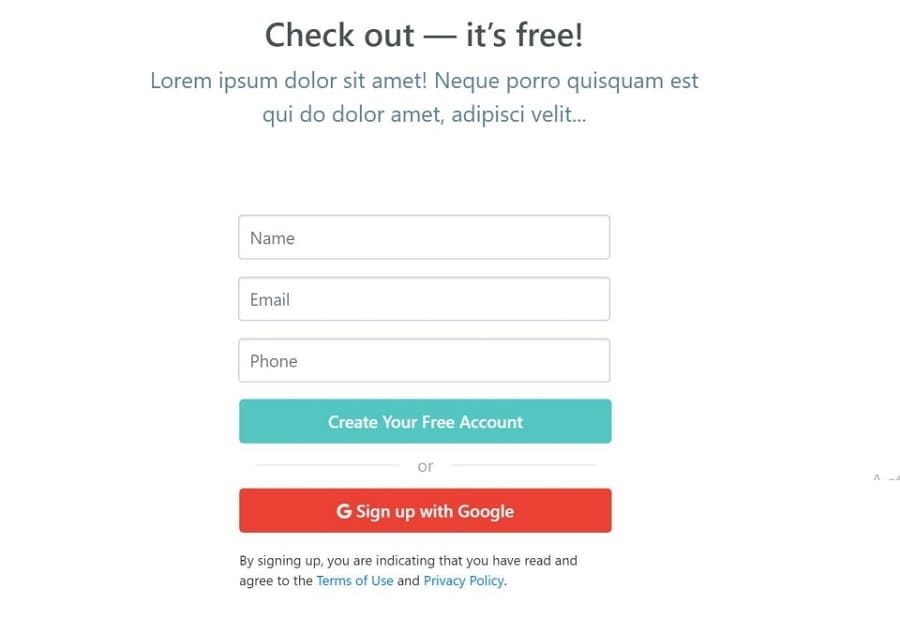
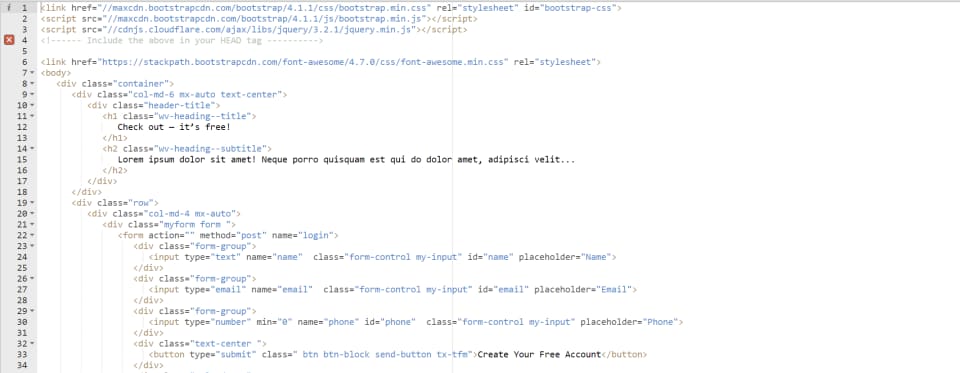
Designer: Dipendra
This form is Google-friendly. You can sign up quickly with your Google account.
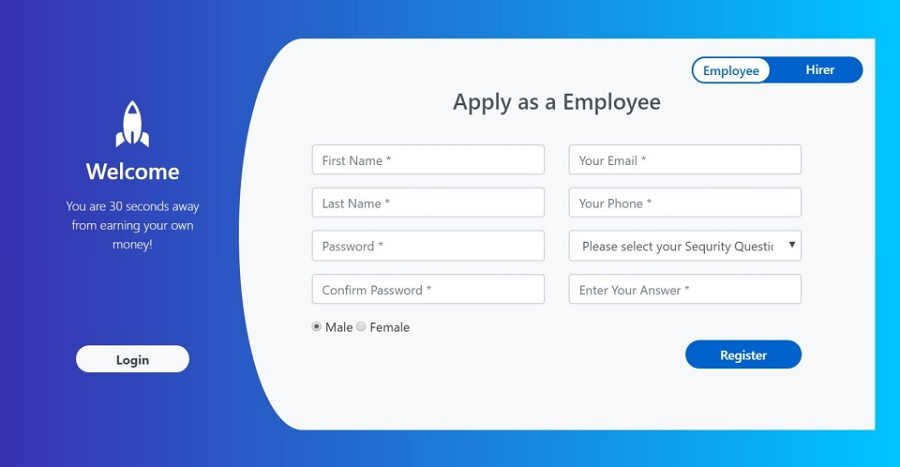
10. Bootstrap Dual Design Registration Form
Designer: Kshiti06
Select Employee or Hirer to reach different forms. The signup form and the login form are displayed on the same screen. The asymmetrical layout design creates a balance between the two forms. This form is also a great website layout design example.
Designer: Nikolay Talanov
Highlight to emphasize
Nice picture
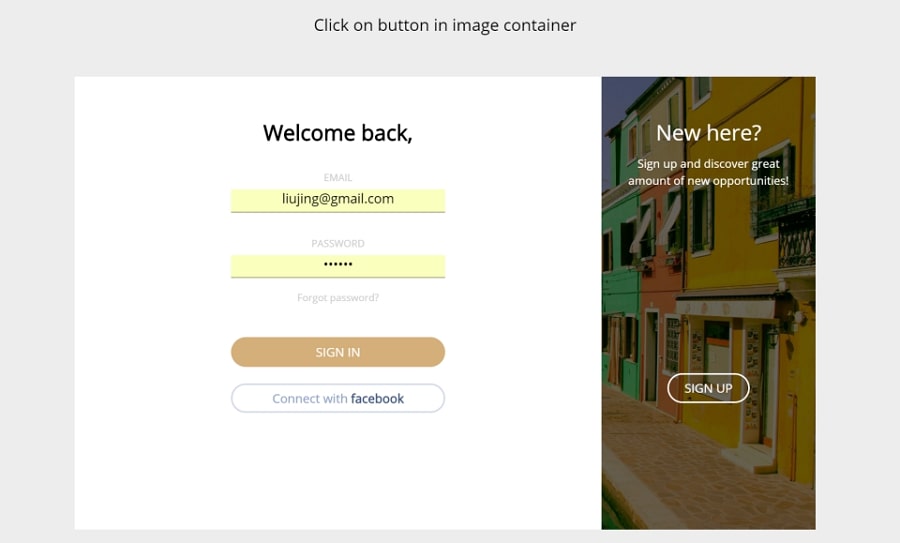
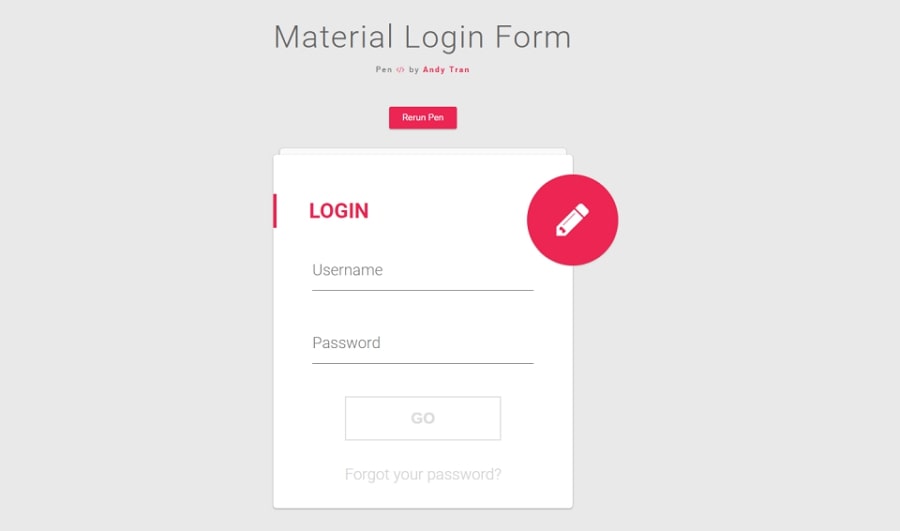
12. Material Login Form
Designer: Andy Tran
Material design has been a widely-adopted principle in web design. Andy used it here in this form and, as you see, it is really great with lovely interactive features. Hover your mouse on the input field or submit button and they will turn the red. The red icon with a pen is actually a switch button to change to the registration form.
Текст справки
Bootstrap 4 предоставляет класс .form-text, который можно использовать для обозначения текста справки. Вы можете комбинировать этот класс со служебными классами, такими как .text-muted.
Вам также следует использовать атрибут aria-descriptionby, чтобы связать текст справки с полем формы. Это гарантирует, что программы чтения с экрана смогут сообщить текст справки, когда пользователь переведёт фокус на поле формы.
<link rel=»stylesheet» href=»https://maxcdn.bootstrapcdn.com/bootstrap/4.0.0/css/bootstrap.min.css»>
<label for=»accountId»>Идентификатор аккаунта</label>
<input type=»text» id=»accountId» class=»form-control» aria-describedby=»helpAccountId»>
<span id=»helpAccountId» class=»form-text text-muted»>Идентификатор аккаунта находится в верхней части счёта.</span>
Bootstrap 4 против Bootstrap 3
Bootstrap 4 использует класс .form-text для отображения текста справки, Bootstrap 3 использует класс .help-block.
Disabled forms
Add the boolean attribute on an input to prevent user interactions and make it appear lighter.
Add the attribute to a to disable all the controls within. Browsers treat all native form controls (, , and elements) inside a as disabled, preventing both keyboard and mouse interactions on them.
However, if your form also includes custom button-like elements such as , these will only be given a style of , meaning they are still focusable and operable using the keyboard. In this case, you must manually modify these controls by adding to prevent them from receiving focus and to signal their state to assistive technologies.
Input Group with Dropdown Button
Add a dropdown button in the input group. Note that you don’t need the .dropdown wrapper, as you normally would.
Dropdown button
Link 1
Link 2
Link 3
Example
<div class=»input-group mt-3 mb-3″> <div class=»input-group-prepend»> <button
type=»button» class=»btn btn-outline-secondary dropdown-toggle»
data-toggle=»dropdown»> Dropdown
button </button> <div class=»dropdown-menu»>
<a
class=»dropdown-item» href=»#»>Link 1</a> <a class=»dropdown-item» href=»#»>Link 2</a> <a class=»dropdown-item» href=»#»>Link 3</a> </div> </div> <input type=»text»
class=»form-control» placeholder=»Username»></div>
CSPs and embedded SVGs
Several Bootstrap components include embedded SVGs in our CSS to style components consistently and easily across browsers and devices. For organizations with more strict CSP configurations, we’ve documented all instances of our embedded SVGs (all of which are applied via ) so you can more thoroughly review your options.
- Close button (used in alerts and modals)
Based on community conversation, some options for addressing this in your own codebase include replacing the URLs with locally hosted assets, removing the images and using inline images (not possible in all components), and modifying your CSP. Our recommendation is to carefully review your own security policies and decide on a best path forward, if necessary.
Доступность
Убедитесь, что у всех элементов управления формы есть подходящие доступные имена, чтобы их назначение можно было донести до пользователей вспомогательных технологий. Самый простой способ добиться этого — использовать элемент или в случае кнопок — включить достаточно описательный текст как часть содержимого .
В ситуациях, когда невозможно включить видимую метку или соответствующее текстовое содержимое, есть альтернативные способы предоставления доступного имени, например:
- Элементы скрыты с помощью класса
- Указание на существующий элемент, который может действовать как метка, используя
- Предоставление атрибута
- Явная установка доступного имени для элемента с помощью
Если ни один из них не присутствует, вспомогательные технологии могут прибегнуть к использованию атрибута в качестве запасного варианта для доступного имени в элементах и . Примеры в этом разделе представляют несколько предлагаемых подходов для конкретных случаев.
Несмотря на то, что использование визуально скрытого содержимого (содержимое , и даже , которое исчезает после того, как в поле формы появляется содержимое) принесет пользу пользователям вспомогательных технологий, отсутствие видимого текста метки все же может быть проблематично для некоторых пользователей. Как правило, лучше всего подходят видимые метки в той или иной форме как с точки зрения доступности, так и удобства использования.
Глобально важно
Bootstrap использует несколько важных глобальных стилей и настроек, о которых Вам нужно знать при его использовании. Все они почти исключительно направлены на нормализацию кроссбраузерных стилей. Давайте погрузимся.
Тип текущего документа
Bootstrap требует использования doctype HTML5. Без него Вы увидите несколько забавных неполных стилей, но его включение не должно вызывать каких-либо серьезных сбоев.
Адаптивный метатег
Bootstrap разработан mobile first (сначала мобильный), стратегия, в которой мы сначала оптимизируем код для мобильных устройств, а затем масштабируем компоненты по мере необходимости с помощью медиа-запросов CSS. Чтобы обеспечить правильный рендеринг и сенсорное масштабирование для всех устройств, добавьте метатег адаптивного окна просмотра (viewport) к Вашему .
Вы можете увидеть пример этого в действии в .
Свойство Box-sizing
Для более простого изменения размеров в CSS мы переключаем глобальное значение с на . Это гарантирует, что не влияет на окончательную вычисленную ширину элемента, но может вызвать проблемы с некоторым сторонним программным обеспечением, таким как Google Maps и Google Custom Search Engine.
В редких случаях Вам нужно переопределить его, используйте что-то вроде следующего:
В приведенном выше фрагменте все вложенные элементы, включая сгенерированный контент с помощью и будут наследовать указанный для этого .
Узнайте больше о коробочной модели и размерах на сайте CSS Tricks.
Перезагрузка
Для улучшения кроссбраузерности рендеринга мы используем Reboot, чтобы исправить несоответствия между браузерами и устройствами, обеспечивая при этом несколько более самоуверенный сброс общих элементов HTML.