Image
Содержание:
- Easy FancyBox: основные особенности плагина
- Modules
- Npm specific
- FAQ
- Интеграция библиотеки FancyBox в Вордпресс без плагинов
- How to use
- Разные варианты работы плагина
- Быстрый старт
- How to Use
- Свой контент в модальном окне
- Setup
- Modules
- Воспроизведение видео
- API
- 2. Использование
- Modules
- Setup
- HTML-разметка для lightgallery
- Advanced
Easy FancyBox: основные особенности плагина
Как и предыдущий плагин, Easy FancyBox для WordPress начинает работать сразу после стандартной установки на CMS по отношению ко всем изображениям. Если вы захотите настроить параметры «под себя», то на странице по адресу в консоли «Настройки» — «Медиафайлы» обнаружите опции, практически идентичные опциям FancyBox для Вордпресс.

Характерными же его отличиями являются:
- плагин частично русифицирован, поэтому разобраться в его настройках самостоятельно не составит большого труда;
- при базовых установках картинки автоматически не объединяются в галереи, Easy FancyBox выводит во всплывающем окне только то изображение, по которому кликнули. Чтобы отобразить группу файлов в лайтбоксе, необходимо создать стандартную галерею Вордпресс в режиме редактирования записи.
Или же в настройках плагина в блоке «Gallery» в поле «Autogallery» выбрать пункт «Все в одной галерее»;

- в варианте «из коробки» Easy FancyBox размещает поверх изображений название, взятое из атрибута alt. Чтобы отключить эту опцию, в блоке «Appearance» снимите галочку возле поля «Показать название»;
- плагин позволяет выбрать тип медиафайлов, которые будут открываться в модальном окне.
Каких-либо существенных недостатков в работе плагина не выявлено. Но если в ваш шаблон ВП встроен «родной» лайтбокс, велика вероятность конфликта и может оказаться, что Easy FancyBox для WordPress не работает. В таком случае имеет смысл обратиться в службу поддержки.
Modules
fancybox code is split into several files (modules) that extend core functionality. You can build your own fancybox version
by excluding unnecessary modules, if needed. Each one has their own
and/or
files.
Some modules can be customized and controlled programmatically. List of all possible options:
Couple of examples. Show thumbnails on start:
Customize share url if displaying hidden video element:
If you would inspect fancybox instance object, you would find that same keys ar captialized — these are references for each
module object. Also, you would notice that fancybox uses common naming convention to prefix jQuery
objects with
.
This is how you, for example, can access thumbnail grid element:
This example shows how to call method that toggles thumbnails:
List of available methods:
If you wish to disable hash module, use this snippet (after including JS file):
Npm specific
** NOTE: I didn’t realize npm’s limitations on versioning. They only allow three numbers. At first I was aiming to keep the versioning equal to fancybox’s, but this is no longer possible without deleting the repo and starting over. You can find the fancybox version this repo uses in either package.json’s «original-version» property, or in a browser console by running: $.fancybox.version.
Install
Example usage
(1) Make sure your html file is referencing the browserified version of your javascript.
(2) This is where fancybox attaches itself to the jquery object.
When turning this into an npm module I decided to standardize the structure a bit. Before fancybox relied on all asset files residing in the same directory. Now if you were to reference the css directly, it expects the images to be relatively located at the ‘../img’ directory. For those unfamiliar, this structure makes more sense because css files should be all concatenated and minified while images won’t be. This means typically you’ll want your css in a separate folder. However, if this doesn’t work with your existing structure then you’ll have to change the paths manually. If you opt to reference the scss instead of the css file, then you have the option of modifying the sass variable ‘$fancybox-image-url’ to match your image folder path. By default this path will be set to ‘../img’. (Note the lack of a trailing slash)
FAQ
Opening/closing causes fixed element to jump
Simply add CSS class to your fixed positioned elements.
Example of using Bootstrap navbar component:
The script measures width of the scrollbar and creates CSS class
that uses this value for property.
Therefore, if your element has , you should positon it using and properties instead. Example:
How to customize caption
You can use option that accepts a function and is called for each group element. Example of appending image download link:
Inside method, refers to the clicked element. Example of using different source for caption:
How to reposition thumbnail grid
There is currenty no JS option to change thumbnail grid position.
But fancyBox is designed so that you can use CSS to change position or dimension for each block
(e.g., content area, caption or thumbnail grid).
This gives you freedom to completely change the look and feel of the modal window, if needed.
View demo on CodePen
Интеграция библиотеки FancyBox в Вордпресс без плагинов
Если вы трепетно относитесь к вопросу улучшения юзабилити сайта, то наверняка вас волнует скорость работы вашего блога. А мы знаем, что большое количество плагинов может замедлять процесс загрузки страниц. Поэтому далее мы рассмотрим вариант внедрения jQuery скрипта FancyBox на WordPress без плагина. Данный способ рекомендуется применять в том случае, если вы хорошо знакомы со структурой и редактированием шаблона Вордпресс и имеете опыт работы с кодом. В процессе могут возникать конфликты с другими скриптами темы, вызванные включением тех или иных опций. Решение этой проблемы в каждом отдельном случае будет индивидуальным, поэтому заранее предусмотреть все варианты сложно.
Для установки библиотеки файлы FancyBox можно найти и скачать по адресу — fancyapps.com/fancybox/. В разархивированном каталоге открываем папку source и копируем jquery.fancybox.css и jquery.fancybox.js, помещаем их в папку fancybox, которую необходимо предварительно создать в корне темы.

Открываем в текстовом редакторе файл functions.php, находим функцию подключения скриптов и вставляем следующий код:
1 2 3 4 5 |
// Fancybox stylesheet.
	wp_enqueue_style( 'fancybox-style', get_template_directory_uri() . '/fancybox/jquery.fancybox.css', array(), ' ' );

// Fancybox script.
	wp_enqueue_script( 'fancybox-script', get_template_directory_uri() . '/fancybox/jquery.fancybox.js', array('jquery'), ' ');
|

Затем открываем для редактирование файл темы header.php и в head помещаем вызов функции FancyBox:
1 2 3 4 5 |
<script type="text/javascript">
$(document).ready(function(){
                              $('.fancybox').fancybox();
                });
</script>
|
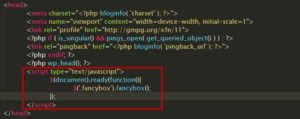
А самой ссылке, оборачивающей изображение, присваиваем class = «fancybox». Таков основной принцип применения библиотеки на WordPress. Детальнее о настройке параметров можно узнать на официальном сайте.
А вот видео о настройке и использовании Fancybox:
Сегодня мы с вами познакомились с широко используемым на сайтах скриптом для красивого отображения картинок в лайтбоксах. Для простоты его интеграции в блог было разработано множество специальных плагинов. Мы рассмотрели одни из самых востребованных: Easy FancyBox и FancyBox For WordPress, узнали, как они работают и в чем их различия. Они проверены опытным путем и работают стабильно. Чтобы понять, какой из инструментов больше подходит вам по функционалу, определите основные задачи, которые он должен выполнять. Нет смысла выбирать тяжелый плагин, чтобы в дальнейшем задействовать только одну или две его опции.
How to use
To get started, download the plugin, unzip it and copy files to your website/application directory.
Load files in the section of your HTML document. Make sure you also add the jQuery library.
<head><scripttype="text/javascript"src="http://ajax.googleapis.com/ajax/libs/jquery/1.7/jquery.min.js"></script><linkrel="stylesheet"href="/fancybox/jquery.fancybox.css"type="text/css"media="screen" /><scripttype="text/javascript"src="/fancybox/jquery.fancybox.pack.js"></script></head>
Create your links with a (or ) if you want a title to be shown, and add a class:
<ahref="large_image.jpg"class="fancybox"title="Sample title"><imgsrc="small_image.jpg" /></a>
If you have a set of related items that you would like to group,
additionally include a group name in the (or ) attribute:
<ahref="large_1.jpg"class="fancybox"rel="gallery"title="Sample title 1"><imgsrc="small_1.jpg" /></a><ahref="large_2.jpg"class="fancybox"rel="gallery"title="Sample title 1"><imgsrc="small_2.jpg" /></a>
Initialise the script like this:
<script>$(document).ready(function(){$('.fancybox').fancybox();});</script>
May also be passed an optional options object which will extend the default values. Example:
<script>$(document).ready(function(){$('.fancybox').fancybox({ padding , openEffect 'elastic', closeBtnfalse});});</script>
Tip: Automatically group and apply fancyBox to all images:
$("a,a,a,a").attr('rel','gallery').fancybox();
Script uses the attribute of the matched elements to obtain the location of the content and to figure out content type you want to display.
You can specify type directly by adding classname (fancybox.image, fancybox.iframe, etc) or attribute:
//Ajax:<ahref="/example.html"class="fancybox fancybox.ajax">Example</a>//or<ahref="/example.html"class="fancybox"data-fancybox-type="ajax">Example</a>//Iframe:<ahref="example.html"class="fancybox fancybox.iframe">Example</a>//Inline (will display an element with `id="example"`)<ahref="#example"class="fancybox">Example</a>//SWF:<ahref="example.swf"class="fancybox">Example</a>//Image:<ahref="example.jpg"class="fancybox">Example</a>
Разные варианты работы плагина
Кроме простого увеличения картинки, плагин пожно использовать для мультимедиа:
<a id="inline" href="#data">Это покажет содержание элемента, который имеет id="data"</a>
Для iframe:
<a href="http://www.mpbox.ru?iframe">Это iframe</a>
или
<a class="iframe" href="http://www.mpbox.ru/">Это iframe</a>
ajax:
<a href="http://www.mpbox.ru/data.php">Это контент, который будет подгружаться с помощью ajax</a>
Если нужно сгруппировать несколько элементов в галерею, нужно добавить им одинаковый rel:
<a id="single_image" rel="group" href="image1.jpg"><img src="image1small.jpg" alt=""/></a>
<a id="single_image" rel="group" href="image2.jpg"><img src="image2small.jpg" alt=""/></a>
<a id="single_image" rel="group" href="image3.jpg"><img src="image3small.jpg" alt=""/></a>
<a id="single_image" rel="group" href="image4.jpg"><img src="image4small.jpg" alt=""/></a>
Пример инициализации скрипта для галереи (атрибут title станет подписью картинки):
jQuery("a").fancybox({
		'transitionIn'		: 'none',
		'transitionOut'		: 'none',
		'titlePosition' 	: 'over',
		'titleFormat'		: function(title, currentArray, currentIndex, currentOpts) {
					return '<span id="fancybox-title-over">Image ' + (currentIndex + 1) + ' / ' + currentArray.length + (title.length ? '   ' + title : '') + '</span>';
				}
});
Показ/скрытие title под наведению мыши
jQuery("a").fancybox({
	'titlePosition'	:	'over',
	'onComplete'	:	function() {
		jQuery("#fancybox-wrap").hover(function() {
			jQuery("#fancybox-title").show();
		}, function() {
			jQuery("#fancybox-title").hide();
		});
	}
});
Кастомизация title
function formatTitle(title, currentArray, currentIndex, currentOpts) {
     return '<div id="tip-title"><span><a href="javascript:;" onclick="$.fancybox.close();"><img src="/data/closelabel.gif" /></a></span>' + (title && title.length ? '<b>' + title + '</b>' : '' ) + 'Картинка ' + (currentIndex + 1) + ' из ' + currentArray.length + '</div>';
}

$("a").fancybox({
	'showCloseButton'	: false,
	'titlePosition' 	: 'inside',
	'titleFormat'		: formatTitle
});
#tip-title {
	text-align: left;
}
#tip-title b {
	display: block;
	margin-right: 80px;
}
#tip-title span {
	float: right;
}
Выборочная инициализация
Применяем скрипт только к тем ссылкам, внутри которых есть рисунок:
jQuery("a:has(img)").fancybox();
jQuery("a,a,a").fancybox();
Другой вариант — применяем к тем ссылкам href которых оканчивается на нужные расширения (jpg, png, gif):
jQuery("a,a,a").fancybox();
Быстрый старт
Подключаем библиотеки и таблицу стилей:
<script type="text/javascript" src="https://ajax.googleapis.com/ajax/libs/jquery/1.6.2/jquery.min.js"></script>
<script type="text/javascript" src="/fancybox/jquery.fancybox-1.3.4.pack.js"></script>
<script type="text/javascript" src="/fancybox/jquery.easing-1.4.pack.js"></script>
<script type="text/javascript" src="/fancybox/jquery.mousewheel-3.0.4.pack.js"></script>
<link rel="stylesheet" href="/fancybox/jquery.fancybox-1.3.4.css" type="text/css" media="screen" />
HTML очень правильный — маленькая картинка внутри ссылки на большую:
<a href="image_big.jpg"><img src="image_small.jpg" width="100" height="100" alt=""/></a>
Если скрипты отключены, то при клике на ссылку просто откроется большая картинка. А если не отключены, то большая картинка откроется не просто, а в красивом, подстраивающемся под размер, отцентрированном окошке с тенькой. Да еще кнопочка «закрыть» будет. Да еще можно подпись из title выводить. И много других приятностей есть. Красота да и только!
Для того, чтобы это все отработало, инициализируем галерею:
<script type="text/javascript">
	jQuery(document).ready(function() {
		jQuery("a").fancybox();
	});
</script>
Конечно, в боевых условиях так огульно на все ссылки вешать плагин не стоит. Это я для примера показал. Лучше выбрать конкретные ссылки по классу, или, например, по родителю.
How to Use
There are a few ways you can use fancyBox.
Initialize with data attributes
The most basic way to use fancyBox is by adding the attribute to a link.
A caption can be added using the attribute. Example:
<a href="image.jpg" data-fancybox data-caption="My caption">
	<img src="thumbnail.jpg" alt="" />
</a>
If you have a group of items, you can use the same attribute value for each of them to create a gallery.
Each group should have a unique value:
<a href="image_1.jpg" data-fancybox="group" data-caption="Caption #1">
	<img src="thumbnail_1.jpg" alt="" />
</a>

<a href="image_2.jpg" data-fancybox="group" data-caption="Caption #2">
	<img src="thumbnail_2.jpg" alt="" />
</a>
Tip:
fancyBox attempts to automatically detect the type of content based on the given url.
If it cannot be detected, the type can also be set manually using attribute:
<a href="images.php?id=123" data-type="image" data-caption="Caption">
	Show image
</a>
Manual calling of fancyBox
fancyBox can be activated at any point within Javascript and therefore does not necessarily need a trigger element.
Example of displaying a simple message:
See for more information.
Свой контент в модальном окне
Fancybox можно использовать для отображения любого HTML-элемента на странице. Особенно часто его используют для показа форм в модальных окнах. Сначала следует создать скрытый элемент с уникальным идентификатором:
|
1 |
<form method=»post»action=»sendmail.php»class=»form»id=»modal-form»style=»display:none;»> <label for=»name»class=»form__label»>Имя<label> <input type=»text»name=»name»class=»form__field»> <label for=»mail»class=»form__label»>E-mail<label> <input type=»text»name=»mail»class=»form__field»> <label for=»message»class=»form__label»>Сообщение<label> <textarea name=»message»class=»form__area»><textarea> <input type=»submit»value=»Отправить»class=»form__submit»> <form> |
Затем просто создайте ссылку, имеющую атрибут data-src, который соответствует идентификатору элемента, который нужно открыть (с предшествующей хэш-меткой (#):
<a data-fancybox data-src=»#modal-form» href=»javascript:;»>
Показать форму
</a>
|
1 |
<adata-fancybox data-src=»#modal-form»href=»javascript:;»> Показатьформу <a> |
Сценарий добавит небольшую кнопку закрытия. Если вы не хотите этого, то ее можно отключить с помощью smallBtn:false.
В модальном окне fancybox, так же можно сделать прокрутку контента добавив скролл. Посмотреть демо на CodePen
Setup
You can install fancyBox by linking and to your html file.
Make sure you also load the jQuery library.
Below is a basic HTML template to use as an example:
<!DOCTYPE html>
<html>
<head>
	<meta charset="utf-8">
	<title>My page</title>

	<!-- CSS -->
	<link rel="stylesheet" type="text/css" href="jquery.fancybox.min.css">
</head>
<body>

	<!-- Your HTML content goes here -->

	<!-- JS -->
	<script src="https://code.jquery.com/jquery-3.1.1.min.js"></script>
	<script src="jquery.fancybox.min.js"></script>
</body>
</html>
Tips:
- Make sure you add the jQuery library first
- If you already have jQuery on your page, you shouldn’t include it second time
- Do not include both fancybox.js and fancybox.min.js files
Downloading using Bower
You can install the latest version of fancyBox with the command:
This will install fancyBox to Bower’s install directory, the default being .
Within you will find an uncompressed release and a compressed release.
Modules
fancyBox code is split into several files (modules) that extend core functionality.
You can build your own fancyBox version by excluding unnecessary modules, if needed.
Each one has their own and/or files.
Some modules can be customized and controlled programmatically.
List of all possible options:
Example (show thumbnails on start):
If you would inspect fancyBox instance object, you would find keys that names ar captialized — these are references for each module object.
Also, you would notice that fancyBox uses common naming convention to prefix jQuery objects with .
This is how you, for example, can access thumbnail grid element:
This example shows how to call method that toggles thumbnails:
List of available methods:
Воспроизведение видео
Плагин Lightgallery позволяет воспроизводить видео с популярных видео-ресурсов, таких, как YouTube, Vimeo, VK, а также различные типы видеоформатов, доступные в HTML5: MP4, WebM, Ogg и т. д.
Чтобы отобразить видео YouTube, Vimeo или VK, вы можете вставить URL-адрес видео или поделиться URL-адресом, который предоставляется YouTube / vimeo в атрибуте data-src. Разметка в остальном такая же, как и для галереи изображений. Lightgallery проверит атрибут data-src и, если это URL-адрес видео YouTube или Vimeo, создаст видео-слайд.
Вы даже можете предоставить изображение постера для каждого видео. Вместо видео будут загружены изображения постеров. Пользователь сможет переходить к другим слайдам с помощью перетаскивания мышью или смахивания. Постеры повышают производительность и сохраняют гибкость вашей галереи, не влияя на взаимодействие с пользователем. Видео будут загружаться, когда пользователь нажимает на изображение-постер. Вы можете поместить URL-адрес изображения постера в атрибут data-poster.
Кроме того, Lightgallery позволяет автоматически загружать миниатюры изображений с YouTube, Vimeo или VK. Вы можете указать размер миниатюр в настройках. Видео будет автоматически приостановлено, когда пользователь начнет переходить к другому слайду.
Пример разметки видео с YouTube и Vimeo с постером
Добавление ссылок на видео в разметку
<div id=»video-gallery»>
<img src=»img/thumb1.jpg» />
</a>
<a href=»https://vimeo.com/1084537″ data-poster=»video-poster2.jpg»>
<img src=»img/thumb2.jpg» />
</a>
…
</div>
|
1 |
<div id=»video-gallery»> <img src=»img/thumb1.jpg»> <a> <ahref=»https://vimeo.com/1084537″data-poster=»video-poster2.jpg»> <img src=»img/thumb2.jpg»> <a> … <div> |
Внимание! Для корректного воспроизведения видео Lightgallery требует, чтобы в ваш документ был включен плагин для видео, доступный на GitHub. Подключение видео-плагина
Подключение видео-плагина
<script src=»js/lightgallery.min.js»></script>
<script src=»js/lg-video.js»></script>
<script>
lightGallery(document.getElementById(‘video-gallery’));
</script>
|
1 |
<script src=»js/lightgallery.min.js»></script> <script src=»js/lg-video.js»></script> <script> lightGallery(document.getElementById(‘video-gallery’)); </script> |
Настройки для видео
При добавлении Lightgallery для видео вы можете указать такие настройки:
Настройки для видеосервисов
lightGallery(document.getElementById(‘video-player-param’), {
youtubePlayerParams: {
modestbranding: 1,
showinfo: 0,
rel: 0,
controls: 0
},
vimeoPlayerParams: {
byline : 0,
portrait : 0,
color : ‘A90707’
}
});
|
1 |
lightGallery(document.getElementById(‘video-player-param’),{ youtubePlayerParams{ modestbranding1, showinfo, rel, controls }, vimeoPlayerParams{ byline, portrait, color’A90707′ } }); |
Для того чтобы в галерее отображались миниатюры для видео-файлов, необходимо подключить еще один плагин, а затем при вызове основной функции плагина, указать такие настройки:
Добавление миниатюр для видео
JavaScript
lightGallery(document.getElementById(‘video-thumbnails’), {
loadYoutubeThumbnail: true,
youtubeThumbSize: ‘default’,
loadVimeoThumbnail: true,
vimeoThumbSize: ‘thumbnail_medium’,
});
|
1 |
lightGallery(document.getElementById(‘video-thumbnails’),{ loadYoutubeThumbnailtrue, youtubeThumbSize’default’, loadVimeoThumbnailtrue, vimeoThumbSize’thumbnail_medium’, }); |
Всю документацию по плагину вы найдете на англоязычном сайте.
API
The fancyBox API offers a couple of methods to control fancyBox.
This gives you the ability to extend the plugin and to integrate it with other web application components.
Core methods
Core methods are methods which affect/handle instances:
When calling fancyBox manually, each group item should follow this pattern:
Example of opening image gallery:
It is also possible to pass only one object. Example of opening inline content:
If you wish to display some html content (for example, a message), then you can use a simpler syntax.
It is advised to use a wrapper around your content.
Instance methods
In order to use these methods, you need an instance of the plugin’s object:
Or you can can just use fancyBox constructor:
Once you have a reference to fancyBox instance the following methods are available:
You can also do something like this:
or simply:
Events
fancyBox fires several events.
Event callbacks can be set as function properties of the options object passed to fancyBox initialization function:
It is also possible to attach an event handler for all instances.
To prevent interfering with other scripts, these events have been namespaced to .
Here is an example of binding to the event:
2. Использование
Fancybox может отображать в модальных окнах изображения, видео, iframes и любой HTML-контент. Для этого плагин имеет много дополнительных атрибутов и JS вариантов, но в этой теме описаны только основные. Более подробную информацию можно посмотреть в первоисточнике.
2.1 Изображения
Для показа галереи фотографии все ее элементы должны содержать одинаковое значение атрибута . Для одиночного фото этот атрибут может быть пустым . Атрибут используется для описания изображения и является не обязательным.
<a href=»image.jpg» data-fancybox=»gallery» data-caption=»Описание фотографии»>
<img src=»thumbnail.jpg» alt=»» />
</a>
|
1 |
<a href=»image.jpg»data-fancybox=»gallery»data-caption=»Описание фотографии»> <img src=»thumbnail.jpg»alt=»» /> </a> |
2.2 Видео
YouTube
</a>
<a data-fancybox=»» href=»https://vimeo.com/151297208″>
Vimeo
</a>
<a data-fancybox=»» href=»video.mp4″>
Ссылка на файл MP4
</a>
<a data-fancybox=»» href=»#myVideo»>
HTML5 элемент
</a>
<video controls id=»myVideo» style=»display:none;»>
<source src=»video.mp4″ type=»video/mp4«>
<source src=»video.webm» type=»video/webm»>
<source src=»video.ogv» type=»video/ogg»>
</video>
|
1 |
<a data-fancybox=»»href=»https://www.youtube.com/watch?v=30BQjlXXamY»> YouTube <a data-fancybox=»»href=»https://vimeo.com/151297208″> Vimeo <a data-fancybox=»»href=»video.mp4″> Ссылка на файл MP4 <a data-fancybox=»»href=»#myVideo»> HTML5 элемент <video controlsid=»myVideo»style=»display:none;»> <source src=»video.mp4″type=»video/mp4″> <source src=»video.webm»type=»video/webm»> <source src=»video.ogv»type=»video/ogg»> </video> |
Для видео можно добавить значение атрибута для создания галереи/плейлиста и описание
2.3 Фрейм <iframe>
<a data-fancybox=»» data-type=»iframe» data-src=»https://fancyapps.com/fancybox/3/docs/#iframe» href=»javascript:;»>
Ссылка на страницу
</a>
|
1 |
<a data-fancybox=»»data-type=»iframe»data-src=»https://fancyapps.com/fancybox/3/docs/#iframe»href=»javascript:;»> Ссылка на страницу |
Обязательный атрибут и , который указывает ссылку на страницу или PDF документ.
Также можно добавить значение для и атрибут
2.4 Встроенный HTML-элемент
<a data-fancybox=»» data-src=»#hidden-content» href=»javascript:;»>
Открыть окно
</a>
<div style=»display: none;» id=»hidden-content»>
Встроенный HTML-элемент
</div>
|
1 |
<a data-fancybox=»»data-src=»#hidden-content»href=»javascript:;»> Открыть окно <div style=»display: none;»id=»hidden-content»> Встроенный HTML-элемент |
Атрибут указывает на ID элемента, который будет показан в модальном окне
Можно добавить атрибут и значение
2.5 Ajax
<a data-fancybox=»» data-type=»ajax» data-src=»/demo/somefile.html» href=»javascript:;»>
Открыть
</a>
|
1 |
<a data-fancybox=»»data-type=»ajax»data-src=»/demo/somefile.html»href=»javascript:;»> Открыть |
Обязательный атрибут и , который указывает ссылку на подгружаемый контент.
Как и во всех предыдущих случаях, можно добавить и значение
Modules
fancyBox code is split into several files (modules) that extend core functionality.
You can build your own fancyBox version by excluding unnecessary modules, if needed.
Each one has their own and/or files.
Some modules can be customized and controlled programmatically.
List of all possible options:
Example (show thumbnails on start):
If you would inspect fancyBox instance object, you would find keys that names ar captialized — these are references for each module object.
Also, you would notice that fancyBox uses common naming convention to prefix jQuery objects with .
This is how you, for example, can access thumbnail grid element:
This example shows how to call method that toggles thumbnails:
List of available methods:
If you wish to disable hash module, use this snippet (after including JS file):
Setup
You can install fancyBox by linking and to your html file.
Make sure you also load the jQuery library.
Below is a basic HTML template to use as an example:
<!DOCTYPE html>
<html>
<head>
	<meta charset="utf-8">
	<title>My page</title>

	<!-- CSS -->
	<link rel="stylesheet" type="text/css" href="jquery.fancybox.min.css">
</head>
<body>

	<!-- Your HTML content goes here -->

	<!-- JS -->
	<script src="https://code.jquery.com/jquery-3.1.1.min.js"></script>
	<script src="jquery.fancybox.min.js"></script>
</body>
</html>
Tips:
- Make sure you add the jQuery library first
- If you already have jQuery on your page, you shouldn’t include it second time
- Do not include both fancybox.js and fancybox.min.js files
Downloading using Bower
You can install the latest version of fancyBox with the command:
This will install fancyBox to Bower’s install directory, the default being .
Within you will find an uncompressed release and a compressed release.
HTML-разметка для lightgallery
В документации к lightgallery написано, что этот плагин не заставляет вас использовать какую-либо конкретную разметку, т.е. вы можете использовать любую разметку, какую захотите. Однако предлагается вариант разметку, в которой будет один div-обертка, внутри которого размещены ссылки на изображения с самими изображениями, а именно:
HTML-разметка для lightgallery
<div id=»lightgallery»>
<a href=»img/img1.jpg» title=»Image 1″>
<img src=»img/thumb1.jpg»>
</a>
<a href=»img/img2.jpg» title=»Image 2″>
<img src=»img/thumb2.jpg»>
</a>
…
</div>
|
1 |
<div id=»lightgallery»> <ahref=»img/img1.jpg»title=»Image 1″> <img src=»img/thumb1.jpg»> <a> <ahref=»img/img2.jpg»title=»Image 2″> <img src=»img/thumb2.jpg»> <a> … <div> |
Advanced
Helpers provide a simple mechanism to extend the capabilities of fancyBox. There are two built-in helpers — ‘overlay’ and ‘title’.
You can disable them, set custom options or enable other helpers. Examples:
Also available are event driven callback methods. The keyword refers to the current or upcoming object (depends on callback method). Here is how you can change title:
It`s possible to open fancyBox programmatically in various ways:
There are several methods that allow you to interact with and manipulate fancyBox, example:
There is a simply way to access wrapping elements using JS:
You can override CSS to customize the look. For example, make navigation arrows always visible,
change width and move them outside of area (use this snippet after including fancybox.css):
In that case, you might want to increase space around box: